Agar Well Diffusion Method: A Complete Guide to Antimicrobial Activity Screening
This article provides a comprehensive guide to the agar well diffusion method, a cornerstone technique for in vitro antimicrobial activity screening.
Agar Well Diffusion Method: A Complete Guide to Antimicrobial Activity Screening
Abstract
This article provides a comprehensive guide to the agar well diffusion method, a cornerstone technique for in vitro antimicrobial activity screening. Tailored for researchers, scientists, and drug development professionals, it covers the foundational principles and scope of the method, delivers a detailed step-by-step protocol for its application, addresses common troubleshooting and optimization challenges, and validates its use through comparative analysis with other established susceptibility testing methods. The content synthesizes current research and established standards to serve as a key resource for both novice and experienced practitioners in the field of antimicrobial discovery.
Understanding the Agar Well Diffusion Method: Principles and Scope
The agar well diffusion method is a foundational in vitro technique widely employed for the initial screening and evaluation of antimicrobial activity. Its principle is rooted in the diffusion of bioactive molecules through a solid growth medium to inhibit microbial growth. Within the broader context of antimicrobial resistance (AMR), a formidable global challenge, the quest for novel antimicrobial agents from both natural and synthetic sources has intensified [1]. In this relentless pursuit, reliable and accessible screening methods are pivotal. The agar well diffusion assay serves as a crucial first step in the discovery pipeline, providing researchers with a qualitative or semi-quantitative means to identify promising antimicrobial candidates from complex mixtures, such as plant extracts, microbial metabolites, or synthetic compound libraries [1] [2]. Its simplicity, cost-effectiveness, and ability to handle numerous samples make it an indispensable tool in research laboratories, despite the development of more advanced technologies [1].
This application note delineates the core scientific principles of diffusion and zone of inhibition formation, provides a detailed protocol for conducting the assay, and offers guidance on data interpretation, specifically framed within antimicrobial activity screening research.
Core Principles and Theoretical Framework
The Diffusion Process
The agar well diffusion assay operates on the principle of passive diffusion. When a test compound, often in a liquid solution, is placed into a well punched into an agar plate, it creates a point source with a high concentration of the antimicrobial agent. A concentration gradient is established between the well and the surrounding agar. Driven by this gradient, the antimicrobial molecules move radially outward from the well through the water-filled pores of the agar gel matrix [3]. The rate and extent of this diffusion are governed by factors such as the molecular size, shape, and solubility of the antimicrobial agent, as well as the density and composition of the agar medium [4].
Formation of the Zone of Inhibition
The agar plate is uniformly inoculated with a standardized suspension of a test microorganism. As the antimicrobial agent diffuses, its concentration decreases with increasing distance from the well. After incubation, a clear, circular zone, known as the Zone of Inhibition (ZOI), becomes visible in the otherwise confluent lawn of microbial growth. This zone represents the area where the concentration of the diffused antimicrobial agent exceeds the Minimum Inhibitory Concentration (MIC) required to prevent the visible growth of that specific microorganism [3]. The diameter of the ZOI is, therefore, a indirect measure of the antimicrobial potency of the test substance under the specific conditions of the assay; a larger zone typically indicates greater potency or a higher diffusion rate [2].
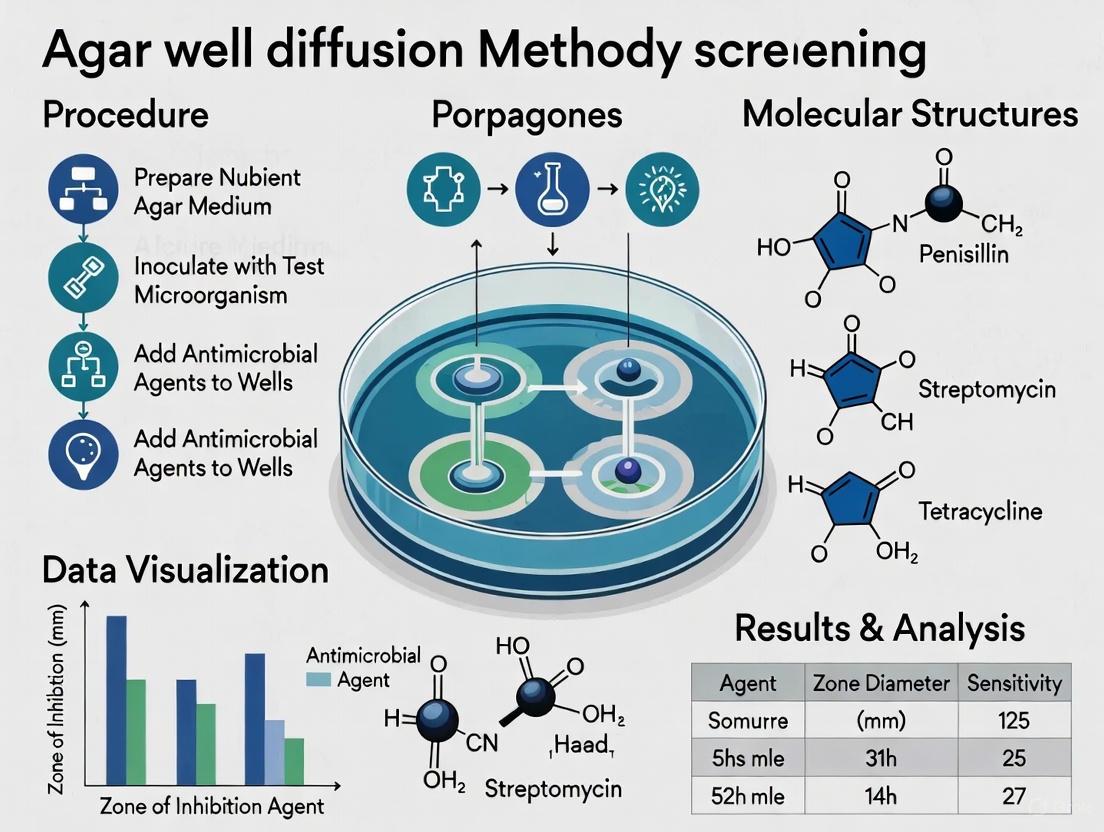
Figure 1: Workflow and Core Principles of the Agar Well Diffusion Assay. The diagram illustrates the sequential process from application of the antimicrobial agent into the well, its radial diffusion through the agar medium, to the final formation of the Zone of Inhibition (ZOI) based on the established concentration gradient relative to the Minimum Inhibitory Concentration (MIC).
Detailed Experimental Protocol
Materials and Reagents
Table 1: Essential Research Reagents and Materials for Agar Well Diffusion Assay
| Item | Function/Description | Key Considerations |
|---|---|---|
| Mueller-Hinton Agar (MHA) | Standardized growth medium for antibacterial testing [2] [5]. | Quality and composition (e.g., cation content, pH) can significantly impact results [5]. |
| Test Microorganism | Target pathogen (e.g., Staphylococcus aureus ATCC 25923). | Use standardized, well-characterized strains from recognized culture collections [5]. |
| Sterile Saline or Broth | Preparation of standardized microbial inoculum. | Typically 0.85% saline or nutrient broth. |
| Cork Borer or Sterile Tip | Creation of uniform wells in the solidified agar. | Common diameters are 6-8 mm [6]. |
| Test Compound/Extract | The antimicrobial agent being evaluated. | Solubility and solvent choice (e.g., DMSO, water, ethanol) are critical and must be controlled for [5]. |
| Positive Control | Standard antibiotic (e.g., ampicillin, chloramphenicol). | Validates assay performance and provides a basis for comparison [6] [5]. |
| Negative Control | Solvent used to dissolve the test compound. | Ensures the solvent alone does not inhibit growth [5]. |
Step-by-Step Procedure
Preparation of Agar Plates: Pour sterilized and cooled Mueller-Hinton Agar (or other appropriate medium) into sterile Petri dishes on a level surface to achieve a uniform depth of approximately 4 mm. Allow the agar to solidify completely [2] [3].
Standardization of Inoculum: Prepare a microbial suspension in sterile saline or broth, adjusting the turbidity to match a 0.5 McFarland standard. This results in a suspension containing approximately 1-2 x 10^8 Colony Forming Units (CFU)/mL for bacteria [2].
Inoculation of Agar Plate: Using a sterile cotton swab, inoculate the entire surface of the agar plate uniformly with the standardized microbial suspension. Ensure confluent growth by swabbing in multiple directions [3].
Creation of Wells: Using a sterile cork borer or pipette tip, aseptically punch wells (typically 6-8 mm in diameter) into the solidified, inoculated agar. Carefully remove the agar plugs without damaging the well walls [6].
Application of Test and Control Substances: Using a sterile pipette, fill the wells with a precise volume (e.g., 50-100 µL) of the test compound, positive control, and negative control solutions. Avoid overfilling to prevent spillage.
Pre-diffusion and Incubation: Allow the plates to stand at room temperature or refrigerate for approximately 1 hour to enable pre-incubation diffusion of the substances into the agar. Subsequently, incub the plates in an inverted position at the optimal temperature for the test microorganism (e.g., 35±2 °C for many bacteria) for 16-24 hours [2] [3].
Measurement of Zones of Inhibition: After incubation, measure the diameter of the complete inhibition zones, including the well diameter, to the nearest millimeter using a caliper or ruler. The zone edge is defined by the point where visible growth starts [3].
Data Interpretation and Analysis
Quantitative Measurements and Reporting
The primary quantitative data from this assay is the diameter of the zone of inhibition. It is crucial to report the mean diameter from replicate experiments along with standard deviation or error. For a more precise assessment, some researchers calculate a corrected ZOI by subtracting the well diameter from the total measured zone diameter, which can help account for variations in sample volume or well size [3].
Table 2: Example of Quantitative Data from an Agar Well Diffusion Assay Using Onion Skin Extract [3]
| Concentration (mg/mL) | S. aureus (mm)* | E. coli (mm)* |
|---|---|---|
| 1 | 7.33 ± 0.33 | 7.83 ± 0.17 |
| 5 | 8.17 ± 0.17 | 8.50 ± 0.29 |
| 10 | 8.83 ± 0.44 | 10.17 ± 0.44 |
| 25 | 10.83 ± 0.17 | 11.50 ± 0.29 |
| 50 | 11.67 ± 0.17 | 12.83 ± 0.44 |
| 100 | 14.17 ± 0.44 | 15.17 ± 0.60 |
| Positive Control | 24.50 ± 0.29 | 24.67 ± 0.44 |
| Negative Control | NIZ | NIZ |
NIZ: No Inhibition Zone
Limitations and Strategic Considerations
While highly valuable for screening, the agar well diffusion method has inherent limitations that researchers must consider when interpreting data and designing experiments:
- Qualitative/Semi-Quantitative Nature: The assay does not directly yield a Minimum Inhibitory Concentration (MIC) value, which is a more precise measure of antimicrobial potency [2]. It provides a relative comparison of potency between samples.
- Influence of Diffusibility: The size of the ZOI is a function of both antimicrobial efficacy and the compound's ability to diffuse through agar. A large molecule with strong antimicrobial activity may produce a small zone if it diffuses poorly, potentially leading to false negatives [4].
- Distinction of Cidal vs. Static Effects: A clear ZOI indicates inhibition of growth (bacteriostatic effect) but does not confirm microbial death (bactericidal effect). Subsequent tests, such as subculturing from the ZOI, are required to determine tidal activity [3].
- Standardization Challenges: For novel compounds, especially plant-derived polyphenols, there are no established interpretive criteria (breakpoints) to categorize microorganisms as susceptible or resistant, unlike for clinical antibiotics [5]. Results are typically compared to controls and reported as inhibition zone diameters.
Figure 2: Data Interpretation and Subsequent Steps. A decision pathway for analyzing Zone of Inhibition results and determining the appropriate follow-up experiments to validate and characterize antimicrobial activity.
The agar well diffusion method remains a cornerstone technique in the initial phases of antimicrobial discovery due to its simplicity, low cost, and high throughput capability. A deep understanding of the science of diffusion and zone of inhibition is paramount for designing robust experiments and interpreting results accurately. While it provides an excellent first-pass screening tool, its findings should often be supplemented with more quantitative methods, such as broth microdilution for MIC determination, to fully characterize the potency and mechanism of promising antimicrobial agents in the fight against drug-resistant pathogens [1] [2].
The agar well diffusion method is a cornerstone technique in antimicrobial activity screening, prized for its simplicity, cost-effectiveness, and ability to handle diverse sample types. This method is vital for researchers combating the global threat of antimicrobial resistance (AMR), providing a foundational tool for discovering new therapeutic agents from natural and synthetic sources [1] [2]. Its principle relies on the diffusion of test compounds from a reservoir (a well cut into the agar) into the surrounding medium, which is seeded with a test microorganism. The resulting zone of inhibition around the well provides a qualitative measure of antimicrobial potency [6] [1].
This application note details the core protocols and specific applications of the agar well diffusion method, framing it within the essential workflow of modern antimicrobial discovery.
Core Protocol: Agar Well Diffusion Method
The following section provides a detailed, step-by-step methodology for performing the agar well diffusion assay.
The diagram below illustrates the generalized experimental workflow for the agar well diffusion method.
Detailed Materials and Methodology
Research Reagent Solutions and Essential Materials
Table 1: Essential materials and reagents for the agar well diffusion assay.
| Item | Function/Description | Example Specifications |
|---|---|---|
| Mueller Hinton Agar (MHA) | A standardized, non-selective medium recommended for antibacterial susceptibility testing by CLSI [2] [7]. | Commercially available dehydrated powder; prepared according to manufacturer instructions. |
| Potato Dextrose Agar (PDA) | A common medium used for determining antifungal activity [6]. | Commercially available dehydrated powder. |
| Sterile Cork Borer | For creating uniform wells in the solidified agar medium [6]. | Typically 5-8 mm in diameter; sterilized by autoclaving or flaming. |
| 0.5 McFarland Standard | A reference standard to adjust the turbidity of the microbial inoculum to approximately 1-2 x 10^8 CFU/mL [2] [7]. | Commercially available suspension or prepared in-house. |
| Sterile Swabs | For creating a uniform bacterial lawn on the surface of the agar medium [6] [7]. | Cotton or synthetic tipped. |
| Positive Control (Antibiotic Discs) | Standardized controls to validate the assay performance (e.g., Ampicillin, Chloramphenicol) [6]. | Commercially available discs with known potency. |
| Negative Control (Solvent) | Control for any antimicrobial activity from the sample solvent (e.g., distilled water, phosphate buffer) [7]. | Matches the solvent used to prepare the test sample. |
Step-by-Step Protocol:
- Preparation of Inoculum: Fresh overnight broth cultures of the test microorganisms (bacterial/fungal pathogens) are prepared. The turbidity of the suspension is adjusted to match a 0.5 McFarland standard, which corresponds to approximately 1-2 x 10^8 Colony Forming Units (CFU)/mL for bacteria [2] [7].
- Inoculation of Agar Plates: The surface of sterile Mueller Hinton Agar (for bacteria) or Potato Dextrose Agar (for fungi) plates is inoculated by spreading the standardized microbial suspension evenly with a sterile cotton swab [6] [7].
- Well Creation: Using a sterile cork borer or tip, uniform wells (typically 5-8 mm in diameter) are aseptically punched into the inoculated agar [6] [7].
- Sample Introduction: A defined volume (e.g., 50-100 µL) of the test sample (e.g., bacterial culture supernatant, plant extract, probiotic suspension) is introduced into the respective wells using a sterile pipette. Appropriate positive (standard antibiotics) and negative (solvent) controls are included [6] [7].
- Pre-Diffusion and Incubation: The plates are left at room temperature for about 1 hour to allow for pre-diffusion of the sample into the agar. Subsequently, the plates are incubated at the optimal temperature for the test microorganism (e.g., 37°C for 24 hours for most human bacterial pathogens) [6].
- Analysis: After incubation, the diameters of the clear zones of inhibition (ZOI) surrounding the wells are measured in millimeters using a caliper or ruler. The ZOI indicates the concentration gradient of the antimicrobial agent and its effectiveness in inhibiting the growth of the test microorganism [6] [2].
Key Applications and Protocols
The agar well diffusion method is highly versatile. The table below summarizes its key applications, and subsequent sections provide specific experimental contexts.
Table 2: Key applications of the agar well diffusion method in antimicrobial research.
| Application Area | Test Sample | Target Pathogens | Key Findings/Utility |
|---|---|---|---|
| Probiotic Screening | Cell-free metabolites, culture supernatants, or whole cells of probiotic strains like Lactobacillus plantarum [7]. | Food-borne pathogens (E. coli, S. aureus, Salmonella spp.) [7]. | Zones of inhibition (10-30 mm) demonstrate probiotic strain's antibacterial potential and utility in combating multi-drug resistant (MDR) bacteria [7]. |
| Natural Product Discovery | Extracts from Actinobacteria, plants, or fermented products (e.g., curd whey) [6] [7]. | Human, shrimp, and fungal pathogens [6]. | Rapid primary screening of a large number of extracts or fractions to identify promising antimicrobial leads [6] [8]. |
| Synergistic Studies | Combination of a probiotic supernatant or natural extract with a standard antibiotic [7]. | MDR clinical isolates [7]. | A remarkable increase in the zone diameter indicates a synergistic effect, offering strategies to rejuvenate the efficacy of existing antibiotics [7]. |
Application Note 1: Screening Probiotic Antimicrobial Activity
Objective: To evaluate the antibacterial potential of commercially available probiotic formulations against common food-borne pathogens.
Protocol Modifications:
- Test Samples: Probiotic granules or powders are dissolved/suspended in sterile distilled water or appropriate buffer [7].
- Pathogens: Use freshly cultured food-borne pathogens such as Escherichia coli, Bacillus cereus, Staphylococcus aureus, and Salmonella typhi [7].
- Controls: Use standard antibiotic discs as positive controls and the suspension solvent as a negative control.
- Analysis: Measure and compare the ZOIs. The results can be confirmed and quantified further by determining the Minimum Inhibitory Concentration (MIC) using broth microdilution techniques [7].
Application Note 2: Evaluating Natural Product Extracts
Objective: To screen Actinobacteria isolates for the production of antimicrobial compounds.
Protocol Modifications:
- Test Samples: Cell-free culture supernatants or organic solvent extracts of Actinobacteria strains grown in various production media [6] [8].
- Pathogens: A panel of Gram-positive, Gram-negative bacteria, and fungi can be used to determine the spectrum of activity [6].
- Specifics: Nutrient agar is typically used for antibacterial activity, while Potato Dextrose Agar is used for antifungal activity [6].
- Analysis: The inhibition zones of different Actinobacteria strains (e.g., AVVM1 to AVVM11) are compared to each other and to standard antibiotics to identify the most potent producers [6].
Application Note 3: Assessing Synergistic Effects
Objective: To investigate the synergistic interaction between a natural product (e.g., probiotic supernatant) and a conventional antibiotic against a multi-drug resistant pathogen.
Protocol Modifications:
- Experimental Setup: The assay is performed as described in the core protocol.
- Test Groups: Include wells for (a) the natural product alone, (b) the antibiotic alone (can be a disc placed adjacent to the well), and (c) a well containing the combination of both agents.
- Analysis: Synergy is indicated by a significant increase in the zone of inhibition in the combination group compared to the zones produced by each agent individually. The effect can be quantified by calculating the fractional inhibitory concentration (FIC) index through checkerboard broth microdilution assays for validation [7].
Advantages and Limitations
Advantages:
- Simplicity and Low Cost: The method is technically straightforward and requires no specialized equipment, making it accessible for most laboratories [1] [2].
- High-Throughput Potential: It is suitable for the initial screening of a large number of samples, such as microbial isolates or plant extracts [2] [8].
- Flexibility: It can be applied to a wide range of sample types, including turbid or insoluble materials that are not suitable for disk diffusion assays [1].
Limitations:
- Qualitative/Semi-Quantitative: The method does not directly provide a Minimum Inhibitory Concentration (MIC) value, as the ZOI is influenced by the diffusion rate of the compound in agar [2].
- Diffusion Dependency: The size of the inhibition zone is affected by the molecular weight, charge, and hydrophobicity of the antimicrobial agent, which can bias results [2].
- Cannot Distinguish Bacteriostatic vs. Bactericidal Effects: The zone of inhibition indicates growth inhibition but does not confirm whether the effect is reversible (bacteriostatic) or lethal (bactericidal) [2].
The agar well diffusion method remains an indispensable tool in the initial stages of antimicrobial discovery. Its robust and adaptable nature allows researchers to efficiently screen probiotics, natural product extracts, and synthetic compounds for bioactive potential. While its qualitative nature is a limitation, it serves as an excellent primary filter. For comprehensive characterization, results from the well diffusion assay should be followed by quantitative methods like broth microdilution to determine MICs and time-kill kinetics to establish the nature of the antimicrobial activity [1] [2]. In the relentless fight against antimicrobial resistance, this classic technique continues to provide a solid foundation for identifying the next generation of antimicrobial agents.
The agar well diffusion method is a cornerstone technique for the initial screening and evaluation of antimicrobial activity in research and development. Its principle relies on the diffusion of an antimicrobial agent from a reservoir (a well cut into the agar) into the surrounding medium, which has been seeded with a test microorganism. The resulting zone of inhibition around the well is a measurable indicator of antimicrobial efficacy [6] [2]. As antibiotic resistance continues to pose a formidable global challenge, the drive to discover novel antimicrobial agents from natural and synthetic sources has intensified, underscoring the critical need for robust and standardized screening methods [1]. This document outlines the essential requirements for media, test organisms, and quality control strains to ensure the reliability, reproducibility, and accuracy of data generated using the agar well diffusion method within a rigorous research context.
Media Requirements
The selection of an appropriate growth medium is paramount, as it must support robust growth of the test microorganism while allowing for optimal diffusion of the antimicrobial substance. Mueller-Hinton Agar (MHA) is the most recommended and widely used medium for antibacterial testing due to its well-documented reproducibility, low antagonism, and compliance with standards set by the Clinical and Laboratory Standards Institute (CLSI) and the European Committee on Antimicrobial Susceptibility Testing (EUCAST) [9] [2]. For specific fastidious bacteria or antifungal activity screening, the medium may require modification or substitution.
Table 1: Standard Media for Agar Well Diffusion Assays
| Microorganism Type | Standard Medium | Specific Modifications/Alternatives | Purpose |
|---|---|---|---|
| Non-fastidious Bacteria | Mueller-Hinton Agar (MHA) | None | Standardized testing for reproducible results [2] |
| Fastidious Bacteria | Supplemented MHA | As specified by CLSI/EUCAST standards | Supports growth of pathogens like Streptococci and Haemophilus influenzae [2] |
| Fungi/Yeast | Mueller-Hinton Agar + 2% Glucose + 0.5μg/mL Methylene Blue (MHA+GMB) | Potato Dextrose Agar (PDA) | Enhances detection of antifungal activity; PDA is commonly used for molds and fungi [6] [2] |
| General Screening | Nutrient Agar | Potato Dextrose Agar | Commonly used in screening studies for antibacterial and antifungal activity, respectively [6] |
Test Organisms
A well-characterized and standardized panel of test microorganisms is crucial for comprehensive antimicrobial screening. This panel should include representative strains of Gram-positive and Gram-negative bacteria, as well as fungi, to determine the spectrum of activity. Researchers often utilize reference strains obtained from international culture collections, such as the American Type Culture Collection (ATCC), to ensure consistency and allow for cross-study comparisons [9].
Table 2: Representative Test Organisms for Antimicrobial Screening
| Category | Example Species | Reference Strain Example | Relevance |
|---|---|---|---|
| Gram-Positive Bacteria | Staphylococcus aureus, Enterococcus faecalis, Bacillus cereus | S. aureus ATCC 25923 | Common pathogens; models for antibiotic resistance [6] [9] |
| Gram-Negative Bacteria | Escherichia coli, Pseudomonas aeruginosa, Salmonella typhimurium, Klebsiella pneumoniae | E. coli ATCC 25922 | Models for outer membrane permeability and efflux mechanisms [6] [9] |
| Fungi/Yeast | Candida albicans, Candida tropicalis | C. albicans ATCC 2091 | Common models for antifungal susceptibility testing [9] |
| Animal Pathogens | Pasteurella multocida, Mannheimia haemolytica | Specific serovars | Relevant for veterinary drug development [10] |
Quality Control Strains
Incorporating quality control (QC) strains into every assay run is non-negotiable for validating experimental conditions and ensuring data integrity. QC strains have well-defined susceptibility profiles and are used to monitor the precision and accuracy of the technical procedures. The zone of inhibition diameters obtained for these strains should fall within established published ranges [2].
Table 3: Essential Quality Control Strains
| QC Strain | Standard Media | Typical Use | Importance |
|---|---|---|---|
| Escherichia coli ATCC 25922 | Mueller-Hinton Agar | Antibacterial assay control | Verifies medium performance and diffusion characteristics for Gram-negative bacteria [2] |
| Staphylococcus aureus ATCC 25923 | Mueller-Hinton Agar | Antibacterial assay control | Verifies medium performance and diffusion characteristics for Gram-positive bacteria [2] |
| Pseudomonas aeruginosa ATCC 27853 | Mueller-Hinton Agar | Antibacterial assay control | Particularly important for testing diffusion of larger molecules or nanoparticles [9] |
| Candida albicans ATCC 90028 | MHA + GMB or PDA | Antifungal assay control | Monitors performance of media and conditions for yeast testing [1] |
Detailed Experimental Protocol: Agar Well Diffusion Method
The following diagram illustrates the key stages of the agar well diffusion protocol:
Step-by-Step Procedure
Preparation of Agar Plates
- Prepare the appropriate medium (e.g., Mueller-Hinton Agar) according to the manufacturer's instructions.
- Autoclave to sterilize and pour approximately 20-25 mL into each sterile Petri dish on a level surface to ensure uniform thickness. Allow the agar to solidify completely at room temperature [2].
Standardization of Inoculum
- Prepare a fresh broth culture of the test or QC organism and incubate until it reaches the mid-logarithmic phase of growth (typically 3-5 hours).
- Adjust the turbidity of the bacterial suspension to a 0.5 McFarland standard, which is equivalent to approximately 1-2 x 10^8 Colony Forming Units (CFU)/mL [2]. For fungal suspensions, adjust to 1.0 McFarland standard [9].
Inoculation of Agar Surface
- Within 15 minutes of adjusting the turbidity, dip a sterile cotton swab into the standardized suspension.
- Rotate the swab firmly against the inside of the tube to remove excess fluid.
- Swab the entire surface of the agar plate thoroughly in three directions (rotating the plate approximately 60° each time) to ensure a confluent "lawn" of growth [2].
Creation of Wells
Loading of Test Samples
- Using a sterile pipette, add a precise volume (typically 60-100 µL) of the test sample, positive control (standard antibiotic), and negative control (solvent alone) into their respective wells [6].
- Allow the plates to stand for a pre-incubation diffusion period at room temperature or in a refrigerator for about 1 hour to allow the agent to diffuse into the agar [6].
Incubation
- Invert the plates and incubate them at the optimal temperature for the test microorganism (35±2°C for most human pathogens) for 16-24 hours [2].
Measurement of Zones of Inhibition
Quality Control Verification
- For the assay to be considered valid, the zone diameters for the QC strains must fall within the acceptable ranges published by CLSI or EUCAST for the positive control antibiotics used [2].
The Scientist's Toolkit: Essential Research Reagents and Materials
A successful agar well diffusion assay depends on the consistent quality of its core components. The following table details the essential materials required.
Table 4: Key Research Reagent Solutions and Materials
| Item | Specification / Function | Application Notes |
|---|---|---|
| Mueller-Hinton Agar | Dehydrated powder or prepared plates. Provides a standard medium for reproducible bacterial growth and antimicrobial diffusion [2]. | The gold standard for non-fastidious bacteria. Must be prepared with strict pH control (pH 7.2-7.4). |
| 0.5 McFarland Standard | A barium sulfate suspension used as a visual reference to standardize microbial inoculum density to ~1.5 x 10^8 CFU/mL [2]. | Essential for achieving a confluent lawn. Can be replaced with a densitometer for higher precision. |
| Sterile Cork Borer | A metal borer, typically 6 mm in diameter, for creating uniform wells in the agar [6] [10]. | Ensures consistent well size, which is critical for the reproducibility of zone diameters. |
| Quality Control Strains | Certified reference strains (e.g., E. coli ATCC 25922, S. aureus ATCC 25923) with defined susceptibility profiles [2]. | Must be used in every run to validate the entire testing process, from media to incubation. |
| Standard Antibiotic Disks/Solutions | Known antibiotics (e.g., ampicillin, chloramphenicol) used as positive controls for comparison and QC purposes [6]. | Allows for result comparison across different experiments and laboratories. |
| Solvent Controls | The solvent used to dissolve the test compound (e.g., DMSO, methanol, water). Serves as a negative control [10]. | Critical for confirming that any observed activity is from the test agent and not the solvent. |
Advantages and Inherent Limitations of the Diffusion-Based Approach
Agar well diffusion is a foundational technique in antimicrobial activity screening, widely employed for its simplicity and cost-effectiveness in research and early-stage drug discovery [1] [6]. This method belongs to a broader family of agar diffusion assays, which are based on the principle that an antimicrobial agent diffuses from a reservoir into a solid growth medium seeded with a test microorganism [2] [8]. The resulting zone of inhibition around the reservoir provides a visual and measurable indicator of antimicrobial potency [1]. Within the context of screening novel antimicrobial agents—from plant extracts to synthetic compounds and nanoparticles—this method serves as a valuable initial tool for identifying promising candidates [1] [8]. However, a comprehensive understanding of its principles, advantages, and, crucially, its inherent limitations is essential for researchers, scientists, and drug development professionals to accurately interpret data and make informed decisions on subsequent testing strategies [11] [12]. This application note details the core principles, advantages, and limitations of the diffusion-based approach, providing a standardized protocol for its implementation in antimicrobial screening research.
Core Principles and Key Advantages
The fundamental principle of the agar well diffusion method involves the creation of a concentration gradient of the antimicrobial substance in an agar matrix. When a test compound is placed into a well punched into the agar, it diffuses radially outward into the medium, which has been uniformly inoculated with a test microorganism [1] [2]. After incubation, the growth of the microorganism becomes visible, except in the circular area around the well where the concentration of the diffused compound exceeded the Minimum Inhibitory Concentration (MIC) for that specific strain. The diameter of this clear zone of inhibition is inversely related to the MIC under standardized conditions [2].
The widespread adoption of this method is attributed to a compelling set of practical advantages, particularly for screening purposes.
Table 1: Key Advantages of the Agar Well Diffusion Method
| Advantage | Description |
|---|---|
| Simplicity and Low Cost | The technique is straightforward to perform and does not require sophisticated or expensive instrumentation. The consumables, such as agar plates and cork borers, are inexpensive [1] [2] [13]. |
| High-Throughput Screening | It allows for the simultaneous testing of multiple samples or extracts against one or more microbial targets on a single plate, facilitating rapid initial screening [2] [8]. |
| Visual and Qualitative Results | The zone of inhibition provides an immediate, visual readout of antibacterial activity, making it easy to identify potent samples [6] [8]. |
| Minimal Equipment Requirements | Unlike broth microdilution or advanced techniques like flow cytometry, it can be performed in laboratories with basic microbiological setup [1] [2]. |
The experimental workflow for conducting an agar well diffusion assay involves a series of standardized steps to ensure reproducibility, from plate preparation to data analysis.
Figure 1: Agar Well Diffusion Experimental Workflow
Critical Limitations and Challenges
Despite its utility for qualitative screening, the agar well diffusion method possesses significant inherent limitations that restrict its quantitative application and demand careful consideration.
Physicochemical and Quantitative Limitations
The most critical limitation revolves around the diffusion process itself. The size of the inhibition zone is not solely determined by the antimicrobial potency of the sample but is also profoundly influenced by the diffusibility of the active compound(s) through the aqueous agar matrix [11]. Molecules with high lipophilicity or low water-solubility will not diffuse effectively, leading to disproportionately small or non-existent zones of inhibition even if the sample possesses strong intrinsic antimicrobial activity [11] [12]. This makes the method poorly suited for evaluating non-polar extracts, essential oils, or certain plant-derived compounds [11]. Furthermore, the method is considered primarily qualitative, as it does not directly provide a Minimum Inhibitory Concentration (MIC) value, which is the gold-standard quantitative measure of antimicrobial activity [2] [11]. While approximate MICs can be estimated using algorithms, these are not as accurate as values obtained from dilution methods [2].
Standardization and Reproducibility Challenges
Achieving reproducible results between different laboratories is notoriously difficult with diffusion-based methods due to the multitude of variables that must be rigorously controlled [11] [12].
Table 2: Key Variables Affecting Reproducibility in Well Diffusion Assays
| Variable | Impact on Results |
|---|---|
| Inoculum Density | Higher inoculum sizes can lead to smaller zones of inhibition and potentially false-negative results [2] [12]. |
| Agar Thickness & Depth | Variations affect the diffusion distance and volume of medium, directly influencing the zone size [11]. |
| Pre-incubation Diffusion Time | The time allowed for the compound to diffuse into the agar before incubation (often in a refrigerator) must be standardized [11]. |
| Culture Medium Composition | The nutrient content can affect both microbial growth and the diffusion characteristics of the antimicrobial agent [11] [12]. |
| Solvent Effects | Solvents like DMSO or ethanol used to dissolve samples can themselves inhibit growth or affect diffusion, requiring careful negative controls [12]. |
The interplay of these factors creates a complex relationship that is visualized in the following diagram, highlighting why zone size is an imperfect proxy for pure antimicrobial potency.
Figure 2: Factors Influencing the Zone of Inhibition
Detailed Experimental Protocol: Agar Well Diffusion Assay
Research Reagent Solutions and Essential Materials
Table 3: Essential Materials for Agar Well Diffusion Assay
| Item | Function/Description |
|---|---|
| Mueller-Hinton Agar (MHA) | The non-fastidious recommended medium for antibacterial testing against non-fastidious bacteria. For fungi, Potato Dextrose Agar (PDA) or other specific media are used [6] [2]. |
| Standardized Microbial Inoculum | Test organisms adjusted to a 0.5 McFarland standard (approximately 1-2 x 10^8 CFU/mL for bacteria) in a saline solution [2] [13]. |
| Sterile Cork Borer or Tip | For creating uniform wells (typically 5-8 mm in diameter) in the solidified agar [6]. |
| Positive Control | A known antibiotic (e.g., ampicillin, chloramphenicol) to validate the assay conditions and serve as a reference [12]. |
| Negative Control | The solvent used to dissolve the test sample (e.g., water, DMSO, ethanol) to confirm it does not inhibit growth [12]. |
Step-by-Step Methodology
- Preparation of Inoculated Agar Plates: Melt and cool Mueller-Hinton Agar (or other appropriate medium) to approximately 45-50°C. Inoculate the sterile molten agar with a standardized microbial suspension (e.g., 0.5 McFarland standard), mix gently but thoroughly, and pour into sterile Petri dishes to achieve a uniform depth of approximately 4 mm. Allow the agar to solidify completely at room temperature [2] [13].
- Creation of Wells: Using a sterile cork borer or pipette tip, aseptically punch wells (typically 6-8 mm in diameter) into the solidified agar. Carefully remove the agar plugs without tearing the medium. A typical plate can accommodate 4-6 wells in a circular pattern [6].
- Application of Test Samples: Pipette a precise volume (typically 50-100 µL) of the test sample, positive control, and negative control solution into separate, labeled wells. Ensure the solution does to not overflow the well [6] [14].
- Pre-incubation Diffusion: Place the plates in a refrigerator (approx. 4°C) for 1-2 hours. This pre-incubation period is critical as it allows the test compound to diffuse into the agar before microbial growth begins, leading to a sharper zone edge [11].
- Incubation: Transfer the plates to an incubator set at the optimal temperature for the test microorganism (e.g., 37°C for many human pathogens) for 16-24 hours (or as required for the specific organism). Incubate the plates in an inverted position to prevent condensation from dripping onto the agar surface [2].
- Measurement and Analysis: After incubation, measure the diameter of the zones of inhibition (including the well diameter) to the nearest millimeter using a caliper or ruler. The zone is defined as the area showing no visible growth. Record the measurements for all samples and controls [2] [13].
The agar well diffusion method remains a valuable tool in the initial stages of antimicrobial screening due to its simplicity, low cost, and ability to handle multiple samples efficiently [1] [2]. It provides an excellent first-pass method for identifying crude extracts or compounds with antimicrobial potential. However, researchers must be acutely aware of its inherent limitations, particularly its qualitative nature, poor suitability for non-polar compounds, and susceptibility to experimental variables that can compromise reproducibility and quantitative analysis [11] [12]. Consequently, results from agar well diffusion assays should be considered preliminary. Promising candidates identified through this method must be subjected to more quantitative techniques, such as broth microdilution for MIC determination and time-kill kinetics studies, to fully characterize their antimicrobial efficacy and potential for further development [2] [11].
Executing the Assay: A Standardized Step-by-Step Protocol
Within the framework of research aimed at screening for novel antimicrobial agents, the agar well diffusion method stands as a fundamental, reliable, and widely used technique for the initial evaluation of antimicrobial activity [2]. Its principle relies on the diffusion of a test substance from a reservoir (a well) into a solidified agar medium that has been seeded with a test microorganism. The subsequent formation of a zone of inhibition around the well provides a qualitative and semi-quantitative measure of the compound's ability to suppress microbial growth [6]. The reproducibility and accuracy of this entire assay are critically dependent on the initial, meticulous preparation of the agar plates and a standardized test inoculum [15]. This protocol details these essential first steps, which form the foundation for any robust antimicrobial screening program.
Materials and Reagents
Research Reagent Solutions
The following table lists the essential materials and reagents required for the preparation of agar plates and test inoculum.
Table 1: Essential Materials and Reagents
| Item | Specification / Function |
|---|---|
| Agar Powder | A gelling agent derived from seaweed, forming a solid matrix for microbial growth. Mueller Hinton Agar (MHA) is the standard for non-fastidious bacteria [15]. |
| Nutrient Medium | Provides essential nutrients for microbial growth. Common choices include Mueller Hinton Broth (MHB) for inoculum preparation and MHA for plates [15]. |
| Sterile Distilled Water | Solvent for preparing agar and broth solutions [16]. |
| Antimicrobial Agent (Standard) | A known antibiotic solution (e.g., at 1000x concentration) for use as a positive control and for quality assurance [16]. |
| Test Microorganism | A standardized, pure culture of the target bacterium (e.g., Staphylococcus aureus ATCC 25923) or fungus [15]. |
| Saline Solution (0.85% NaCl) | A sterile isotonic solution used for making bacterial suspensions and dilutions [17]. |
| McFarland Standard | A reference suspension used to standardize the turbidity (and thus the approximate cell density) of the bacterial inoculum [15]. The 0.5 McFarland standard is equivalent to ~1-2 x 10⁸ CFU/mL for bacteria [2]. |
Equipment
- Autoclave
- Water Bath (45-50°C)
- Laminar Flow Hood
- Bunsen burner
- Sterile Petri dishes (e.g., 90-100 mm diameter)
- Sterile pipettes and micropipettes
- Sterile swabs
- Vortex mixer
- Spectrophotometer (optional, for inoculum standardization)
- Incubator
Protocol
Preparation of Agar Plates
The following workflow outlines the key steps involved in preparing Mueller Hinton Agar (MHA) plates, the recommended medium for routine antibacterial susceptibility testing [15].
Detailed Procedure:
- Weighing and Suspension: Weigh the appropriate amount of Mueller Hinton Agar (MHA) powder. A typical preparation uses 37-38 grams per liter of distilled water [16]. Transfer the powder to an autoclavable flask and add the required volume of sterile distilled water. Swirl to form a suspension.
- Sterilization: Loosely cover the flask (with a cap or aluminum foil) and sterilize the mixture using an autoclave at 121°C and 15-20 psi for at least 30 minutes [16] [18].
- Cooling: After autoclaving, carefully remove the flask and place it in a water bath set to 45-50°C. Allow the agar to cool until the flask is comfortable to hold with bare hands. This temperature is low enough to prevent the formation of excessive condensation on the plate lids but high enough to keep the agar in a liquid state [16] [18].
- Pouring Plates: Working aseptically in a laminar flow hood or near a Bunsen burner, pour approximately 20-25 mL of the molten agar into each sterile Petri dish [18]. Pour steadily to avoid creating air bubbles. If adding specific antibiotics or test compounds, this is the stage to add them to the cooled agar and mix thoroughly before pouring.
- Solidification and Storage: Leave the plates undisturbed on a level surface until the agar has completely solidified (approximately 30 minutes). For best results, allow the plates to dry further by incubating them upright at room temperature overnight before use. Plates can be stored sealed in plastic bags at 4°C for several weeks [16].
Preparation of Test Inoculum
Standardizing the density of the microbial inoculum is arguably the most critical factor for achieving reproducible and comparable results in the agar well diffusion assay [15]. The goal is to achieve a confluent "lawn" of growth.
Table 2: Inoculum Standardization Guide
| Microorganism Type | Growth Medium | Incubation Conditions | Target Inoculum Density (CFU/mL) | Standardization Method |
|---|---|---|---|---|
| Non-fastidious Bacteria (e.g., E. coli, S. aureus) | Mueller Hinton Broth (MHB) | 35±2°C for 18-24 hours [2] | 1 x 10⁸ [15] | 0.5 McFarland Standard [15] |
| Fastidious Bacteria (e.g., S. pneumoniae) | Enriched Broth (e.g., MHB with blood) | 35±2°C in CO₂ for 18-24 hours [2] | 1 x 10⁸ | 0.5 McFarland Standard |
| Yeasts (e.g., C. albicans) | Sabouraud Dextrose Broth or RPMI 1640 | 35±2°C for 24-48 hours [2] | 1 x 10⁶ to 5 x 10⁶ [2] | 0.5 McFarland Standard (approximate) |
Detailed Procedure (Direct Colony Suspension Method):
- Select Colonies: From a fresh (18-24 hour) agar plate culture, select 3-5 well-isolated colonies of the test microorganism [15].
- Prepare Suspension: Transfer the selected colonies into a tube containing 4-5 mL of sterile saline or MHB.
- Vortex: Vortex the tube vigorously to achieve a homogeneous bacterial suspension.
- Standardize Density: Adjust the turbidity of the suspension to match that of a 0.5 McFarland standard. This is done by comparing the turbidity of the suspension tube against the McFarland standard tube against a card with contrasting lines. Add more bacteria or saline diluent until the turbidity is equivalent [15].
- Use Inoculum: This standardized suspension must be used within 15-30 minutes of preparation to prevent significant changes in bacterial concentration [15].
Quality Control and Troubleshooting
- Positive Control: Always include a well with a known, standard antimicrobial agent on every plate to verify that the test system is functioning correctly and the microorganism is behaving as expected [16].
- Negative Control: Include a well with only the solvent used to dissolve the test compound to rule out any antimicrobial activity from the solvent itself.
- Lawn Check: After inoculation and incubation, the control plate (without any test compounds) should show confluent growth. Discrete, individual colonies indicate an insufficient inoculum density, while an overly heavy growth may impede diffusion.
- Common Issues:
- No zones in positive control: Likely an issue with the inoculum being too dense, the antimicrobial agent being degraded, or incorrect incubation.
- Uneven or slanted zones: Caused by uneven agar thickness or a non-level surface during solidification and incubation.
- No growth on the plate: The inoculum was non-viable or the agar contains inhibitory substances.
The agar well diffusion assay is a fundamental technique for the preliminary screening and evaluation of antimicrobial activity in various substances, including plant extracts, essential oils, synthetic compounds, and nanoparticles [1]. This method is highly valued in research and drug development for its simplicity, cost-effectiveness, and ability to provide rapid, visual results concerning the inhibitory potential of test materials against microbial targets [2] [1]. The creation of wells and the subsequent application of test samples represent a critical phase in this protocol. The accuracy and precision exercised during this step are paramount, as they directly influence the diffusion characteristics of the antimicrobial agent and, consequently, the reliability and reproducibility of the resulting zones of inhibition [12]. This document provides a detailed, standardized protocol for this crucial procedure, framed within the context of antimicrobial activity screening research.
Experimental Workflow
The following diagram illustrates the complete workflow for the agar well diffusion method, with the focal steps of this protocol highlighted.
Figure 1: The complete workflow for the agar well diffusion assay, highlighting the key steps of well creation and sample application.
Research Reagent Solutions
The successful execution of the agar well diffusion assay relies on a set of essential materials and reagents. The table below details these key components and their specific functions within the protocol.
Table 1: Essential materials and reagents for the agar well diffusion assay.
| Item | Function/Description |
|---|---|
| Mueller Hinton Agar (MHA) | The standard non-selective solid growth medium recommended by CLSI and EUCAST for antimicrobial susceptibility testing. It provides a clear background for visualizing zones of inhibition [15] [19]. |
| Test Samples/Supernatants | The solutions being investigated for antimicrobial activity. These can include plant extracts, microbial culture supernatants, essential oils, synthetic compounds, or nanoparticle suspensions [1] [9]. |
| Appropriate Solvents | Vehicles for dissolving or diluting test samples. Common choices include sterile water, dimethyl sulfoxide (DMSO), methanol, ethanol, and acetone. The solvent must not possess antimicrobial activity at the concentration used, and a solvent control is mandatory [12]. |
| Positive Control (Antibiotic) | A standard antibiotic solution of known potency and concentration. This verifies the susceptibility of the test microorganism and the overall performance of the assay [12]. |
| Negative Control (Solvent) | The pure solvent used to dissolve the test sample. This confirms that any observed zone of inhibition is due to the sample and not the solvent [12]. |
| Sterile Well Borer | A sterile cork borer, glass tube, or tip of uniform diameter (typically 6-8 mm) used to punch wells into the solidified agar in an aseptic manner [9] [8]. |
Detailed Experimental Protocol
Step 2A: Creating Wells in the Agar
After the agar plates have been inoculated with the standardized microbial suspension and the lawn has dried, proceed to create the wells.
Table 2: Step-by-step protocol for creating wells in the agar.
| Step | Procedure | Critical Parameters |
|---|---|---|
| 1. Select Equipment | Use a sterile cork borer, stainless steel tube, or pipette tip with a uniform diameter of 6 to 8 mm [9]. | A consistent bore diameter is crucial for the reproducibility of zone sizes. |
| 2. Punch Wells | Using aseptic technique, punch wells into the solidified, inoculated agar. Gently remove the agar plug using a sterile instrument without gouging the base of the plate. | Ensure the well is cleanly cut and the bottom of the well is sealed to the agar surface to prevent sample leakage. |
| 3. Well Arrangement | Space wells evenly, with a minimum distance of 20-30 mm between the centers of adjacent wells and from the edge of the plate. | Adequate spacing prevents overlapping zones of inhibition, allowing for accurate measurement [19]. |
| 4. Final Check | Inspect each well to ensure its integrity. If the well is damaged, the plate should be discarded and the process repeated. |
Step 2B: Applying Test Samples/Supernatants
Immediately after well creation, the test samples and controls are applied.
Table 3: Step-by-step protocol for applying test samples and supernatants.
| Step | Procedure | Critical Parameters |
|---|---|---|
| 1. Prepare Samples | Ensure test samples and controls are at the desired concentration and properly dissolved or suspended. For quantitative assessment, serial dilutions can be tested [1]. | Sample viscosity and solubility can affect diffusion; ensure a homogenous solution/suspension [12]. |
| 2. Pipette into Wells | Using a micropipette, carefully fill each well with a precise volume of the test sample, control, or supernatant. A typical volume is 50-100 µL, depending on the well's capacity [9]. | Do not overfill or spill the sample onto the surface of the agar, as this will distort the zone of inhibition. |
| 3. Sample Allocation | Apply the negative control (solvent) to at least one well and the positive control (standard antibiotic) to another. Apply test samples to the remaining wells. | Proper controls are non-negotiable for validating the assay results [12]. |
| 4. Pre-diffusion (Optional) | Allow the plate to stand at room temperature for 1-2 hours for the sample to pre-diffuse into the agar. This can lead to more concentric zones. | If performed, ensure the plate is placed on a flat, level surface. |
| 5. Incubation | Invert the plates and incubate under conditions suitable for the test microorganism (e.g., 35±2 °C for 16-18 hours for many bacteria) [2] [15]. | Incubation times may vary for fastidious organisms or fungi [2]. |
Quality Control and Troubleshooting
Ensuring the validity of the results requires rigorous quality control and an understanding of potential issues.
Table 4: Common challenges and troubleshooting guidelines for Step 2.
| Challenge | Potential Cause | Recommended Solution |
|---|---|---|
| Uneven or irregular zones | Wells punched too close together; sample spilled on agar surface; uneven agar surface. | Maintain minimum 20-30 mm between wells; pipette carefully; ensure plates are poured on a level surface. |
| No zone with active sample | Well bottom not sealed, leading to sample leakage underneath the agar. | Ensure the well borer is sharp and agar is properly set. Gently press the well after creation if necessary. |
| Zone in negative control well | The solvent used has intrinsic antimicrobial activity at the tested concentration. | Use an alternative, non-inhibitory solvent or further dilute the solvent in the final sample [12]. |
| Inconsistent zone sizes between replicates | Non-uniform well diameters; inaccurate pipetting of sample volumes. | Use a high-quality, consistent well borer; calibrate and use precision micropipettes. |
| Weak or no activity with known antimicrobial | Incompatibility of the sample with the agar medium (e.g., lipophilic compounds). | Consider using a different method, such as broth dilution, or adding surfactants to aid diffusion, though this requires validation [12]. |
Within the framework of a comprehensive thesis on antimicrobial activity screening, the agar well diffusion method serves as a fundamental, qualitative technique for the preliminary evaluation of test compounds against target microorganisms [6]. The incubation step is a critical phase where controlled environmental conditions facilitate the interaction between the diffused antimicrobial agent and the inoculated microbial lawn. Standardizing incubation parameters is paramount to ensuring the reproducibility and reliability of the resultant zones of inhibition (ZOI), which form the basis for initial activity assessments [2]. This protocol details the optimal incubation conditions and timing to achieve consistent and interpretable results.
Standardized Incubation Parameters
The table below summarizes the core incubation parameters for bacterial assays, as established by standardized guidelines such as those from the Clinical and Laboratory Standards Institute (CLSI) [2].
Table 1: Standard Incubation Conditions for Bacterial Assays via Agar Well Diffusion
| Parameter | Typical Standardized Condition | Notes & Considerations |
|---|---|---|
| Temperature | 35 ± 2 °C | The standard for most human bacterial pathogens; some environmental isolates may require different temperatures [2]. |
| Atmosphere | Ambient Air | Standard for non-fastidious, aerobic bacteria. Fastidious organisms (e.g., some streptococci) may require CO₂-enriched atmospheres [2]. |
| Duration | 16–24 hours | The standard timeframe for visible ZOI formation in most common bacteria. Incubation beyond 24 hours is not recommended as it can allow the agent to degrade or the test microorganism to grow into the inhibition zone [20] [2]. |
| Plate Orientation | Inverted (Lid Down) | Prevents condensation from accumulating on the agar surface, which could disrupt the diffusion of the antimicrobial agent and blur the zone edges [20]. |
Experimental Protocol for Incubation and Post-Incubation Analysis
Materials Needed:
- Inoculated agar plates with test and control wells prepared as per previous protocol steps [20].
- Temperature-calibrated incubator.
- Refrigerator (2–8 °C).
- Vernier calipers or a precise ruler.
- Data recording sheet.
Procedure:
- Pre-incubation Diffusion:
- After placing the test solutions into the wells, leave the plates on a level, sterile surface at room temperature for approximately 1 hour [6]. This pre-incubation diffusion period allows the antimicrobial agent to begin diffusing into the agar before microbial growth initiates, helping to establish a more defined concentration gradient.
Incubation:
- Transfer the plates to the incubator, ensuring they are placed in an inverted position (lid down).
- Set the incubator to the predetermined temperature (e.g., 35 ± 2 °C).
- Incubate the plates for the designated period, typically 16–24 hours. Do not stack plates densely to ensure uniform heat and air circulation.
Post-Incubation Handling:
- After the incubation period, remove the plates from the incubator.
- If measurement cannot be performed immediately, plates can be refrigerated (~4 °C) for a few hours to halt further microbial growth. However, measurements should be taken as soon as possible [2].
Measurement of Zones of Inhibition (ZOI):
- Examine each plate for the presence of clear, circular zones around the wells where bacterial growth has been inhibited.
- Using vernier calipers or a ruler, measure the diameter of each inhibition zone in millimeters (mm), including the well's diameter [20].
- Measure the zones from the underside of the Petri dish without opening the lid.
- For clear, circular zones, take a single diameter measurement. For faint or irregularly shaped zones, measure the clearest edge and note the irregularity.
Interpretation and Documentation:
- Record all measurements systematically.
- Larger inhibition zones generally indicate greater antibacterial activity [20].
- Compare the zones of the test substances to those of the positive (known antibiotic) and negative (solvent alone) controls to validate the assay.
- Note that the well diffusion method is primarily qualitative; it indicates the presence of antimicrobial activity but does not directly provide Minimum Inhibitory Concentration (MIC) values [6].
The following workflow diagram illustrates the complete incubation and analysis process.
The Scientist's Toolkit: Essential Research Reagent Solutions
Table 2: Key Research Reagents and Materials for Agar Well Diffusion Assays
| Item | Function in the Experiment |
|---|---|
| Mueller-Hinton Agar (MHA) | The recommended medium for routine antibacterial susceptibility testing. It is well-defined and demonstrates good batch-to-batch reproducibility, allowing for consistent diffusion of most antimicrobial agents [2]. |
| Nutrient Agar | A general-purpose medium often used for antimicrobial screening of non-fastidious microorganisms and for maintaining stock cultures [20] [6]. |
| Cation-Adjusted Mueller-Hinton Broth (CAMHB) | Used for preparing the standardized bacterial inoculum to ensure correct ion concentration, which can affect the activity of certain antibiotics [21]. |
| 0.85% Saline Solution | A sterile isotonic solution used for diluting bacterial cultures to achieve the standard inoculum density, typically equivalent to a 0.5 McFarland standard [21]. |
| Positive Control Antibiotic | A known antibiotic (e.g., ampicillin, chloramphenicol) used to validate the test procedure and provide a benchmark for the performance of the test substance [20] [6]. |
| Sterile Cork Borer / Pipette Tip | For creating uniform wells (typically 5–8 mm in diameter) in the agar medium to receive the test solution [20] [6]. |
| Vernier Calipers | Essential for obtaining precise and accurate measurements of the zones of inhibition in millimeters, ensuring quantitative data from a qualitative method [20]. |
Within the framework of research employing the agar well diffusion method for antimicrobial activity screening, the measurement of zones of inhibition (ZOI) and the subsequent data interpretation constitute a critical, definitive step. This phase transforms the visual results of the bioassay into quantitative and qualitative data, enabling researchers to assess the efficacy of a test compound [22]. The agar well diffusion method is a widely used, cost-effective technique for evaluating the antimicrobial potential of natural extracts, synthetic compounds, and other novel agents [1] [23].
This protocol outlines a standardized procedure for accurately measuring ZOIs, interpreting the data within the appropriate experimental context, and implementing necessary quality controls to ensure result reliability. Adherence to this detailed guide is paramount for generating reproducible and scientifically valid data that can be compared across different studies and for guiding further investigation into promising antimicrobial candidates [24].
Principle of Measurement
The core principle of the agar well diffusion assay is that an antimicrobial agent diffuses from a well into the surrounding agar medium, which has been seeded with a test microorganism. This creates a concentration gradient of the agent. Where the concentration is sufficient to inhibit microbial growth, a clear area termed the zone of inhibition (ZOI) forms around the well [6] [23]. The diameter of this zone is a function of several factors, including the sensitivity of the microorganism, the diffusibility of the antimicrobial agent, and the initial concentration of the agent in the well.
Materials and Equipment
Research Reagent Solutions & Essential Materials
| Item | Function/Brief Explanation |
|---|---|
| Incubated Agar Plates | Plates containing the test organism, incubated for the specified time and temperature, showing visible zones of inhibition. |
| Digital Calipers | Provides highly accurate and precise measurements of zone diameters, preferred over standard rulers for research purposes. |
| Vernier Calipers | An alternative mechanical tool for precise measurement. |
| Ruler with Millimeter Graduations | A acceptable, though less precise, tool for measurement if calipers are unavailable. |
| High-Resolution Scanner or Camera | For creating a permanent, digital record of the plate for documentation, re-measurement, or analysis software. |
| Antibiotic Standards (Positive Controls) | Reference antimicrobials (e.g., ampicillin, chloramphenicol) used to validate the assay and for comparative interpretation [6]. |
| Solvent Controls (Negative Controls) | The solvent used to dissolve the test compound (e.g., DMSO, methanol) to confirm it does not itself produce a zone of inhibition. |
Step-by-Step Measurement Protocol
Pre-Measurement Preparation
- Remove Plates from Incubator: After the standardized incubation period (typically 16-24 hours for most fast-growing bacteria), remove the agar plates from the incubator.
- Visual Inspection: Examine each plate for well-defined, circular zones of inhibition. The zone is identified by a clear area where bacterial growth has been inhibited, surrounding the central well.
- Documentation: Capture a high-resolution digital image of the entire plate against a dark, non-reflective background. Ensure the image includes a scale (e.g., a ruler placed next to the plate). This serves as a permanent record and allows for verification.
Measurement Procedure
- Tool Selection: Use a pair of digital calipers for maximum accuracy. Ensure the calipers are zeroed before use.
- Hold the Plate: Place the plate on a flat, well-lit surface. For safety, ensure the plate lid remains on if possible, or work quickly in a biosafety cabinet to prevent contamination.
- Measure the Diameter:
- Position the caliper's tips across the center of the well, measuring the diameter of the clear zone from one end to the other.
- Measure in Millimeters: Take the measurement from the outer edge of the well to the opposite outer edge of the clear zone. Do not include the diameter of the well itself in the final recorded value, unless specified by an alternative methodology.
- Repeat: Perform the measurement at least twice for each zone, rotating the plate approximately 90 degrees between measurements to account for any minor irregularities. If the zone is not perfectly circular, take multiple measurements and calculate the average diameter.
Data Recording
- Record the raw measurement(s) for each well immediately in a laboratory notebook or electronic data capture system.
- Clearly label each measurement with the corresponding plate identifier, well number, test compound, and concentration.
- Note any anomalies, such as irregular zone shapes, double zones, or faint inhibition, as these may indicate specific interactions or technical issues.
The following workflow diagram illustrates the complete process from plate preparation to final data interpretation.
Data Interpretation and Analysis
Qualitative and Quantitative Interpretation
The measured zone diameter provides a semi-quantitative assessment of antimicrobial activity. The following table offers a general guideline for interpreting results, though organism-specific and compound-specific breakpoints should be established.
| Zone of Inhibition Diameter (mm) | Interpretation | Implication for Test Compound |
|---|---|---|
| No observable zone | No activity | The compound is ineffective at the tested concentration under these conditions. |
| < 8 mm | Weak activity | May warrant further testing at higher concentrations or with different methods. |
| 8 - 14 mm | Moderate activity | Suggests the compound has promising antimicrobial potential. |
| 15 - 19 mm | Strong activity | Indicates a highly effective antimicrobial agent. |
| ≥ 20 mm | Very strong activity | A very potent compound, comparable to strong standard antibiotics. |
Comparative Analysis with Controls
- Positive Control: The zone size of the standard antibiotic validates the test system's functionality. The activity of the test compound can be qualitatively compared to this standard [6].
- Negative Control: The solvent should produce no zone of inhibition. A zone here indicates the solvent is toxic or antimicrobial, invalidating the results for that solvent.
Key Considerations for Accurate Interpretation
- Diffusibility: Compounds with high molecular weight or poor water solubility may diffuse poorly, leading to smaller zones that do not accurately reflect their intrinsic antimicrobial potency [23].
- Agar Depth and Composition: Thicker agar layers or different media can restrict diffusion and reduce zone sizes. Consistency across plates is critical [24].
- Inoculum Density: A heavier inoculum density can lead to smaller or less distinct zones of inhibition. The inoculum must be standardized to a specific turbidity (e.g., 0.5 McFarland standard, ~1 x 10^8 CFU/mL) [6] [23].
Troubleshooting and Quality Control
Accurate data interpretation requires awareness of potential anomalies and implementation of robust quality control measures. The following diagram outlines a systematic approach to addressing common issues.
Quality Control Measures
- Replication: All tests should be performed in at least triplicate to ensure reproducibility and allow for statistical analysis.
- Standardized Reference Strains: Use quality-controlled strains from culture collections (e.g., ATCC) such as Staphylococcus aureus (ATCC 29213) and Escherichia coli (ATCC 25922) for assay validation [23].
- Standard Operating Procedures (SOPs): Develop and adhere to detailed SOPs for every stage, from inoculum preparation to incubation, to minimize inter-assay variability.
The agar well diffusion method is a cornerstone technique in antimicrobial activity screening, providing a accessible and effective means to evaluate the efficacy of various test substances [1]. This method is particularly valuable for initial screenings of complex biological samples, such as cell-free supernatants (CFS) and plant extracts, where the active antimicrobial components may not be fully characterized [25] [8]. Its principle relies on the diffusion of test compounds from a reservoir (a well) into a solid growth medium seeded with a test microorganism. If the compounds possess antimicrobial properties, they create a clear zone of inhibition around the well, the diameter of which corresponds to the substance's efficacy [1] [9].
This protocol details the application of the agar well diffusion method for screening two key classes of substances: CFS from lactic acid bacteria (LAB) fermentations and antimicrobial plant extracts. The method's utility in this context is demonstrated by its application in recent, cutting-edge research, making it an indispensable tool for researchers and drug development professionals working to discover novel antimicrobial agents [25] [26].
Key Applications and Supporting Data
The agar well diffusion assay is extensively used for the primary screening of antimicrobial activity from diverse sources. The table below summarizes quantitative findings from recent studies investigating cell-free supernatants and plant-derived products.
Table 1: Quantitative Findings from Agar Well Diffusion Assays on Various Substances
| Test Substance | Source / Type | Test Microorganism | Inhibition Zone Diameter (mm) | Key Finding / Citation |
|---|---|---|---|---|
| LAB Cell-Free Supernatant | Lactiplantibacillus plantarum K014 (in MRS broth) | Cutibacterium acnes | 23.67 | Highest activity among 10 screened LAB strains [25]. |
| LAB CFS (Plant-Based Medium) | L. plantarum K014 (in Brown Rice medium) | Cutibacterium acnes | 16.00 | Demonstrated efficacy of plant-based fermentation [25]. |
| Optimized LAB CFS | L. plantarum K014 (Optimized Brown Rice medium) | Cutibacterium acnes | 21.67 | Response surface methodology enhanced activity [25]. |
| Danish Honey | Water Mint (Mentha aquatica) | Staphylococcus aureus | Varying | Exhibited greater effect than medical-grade Manuka honey [26]. |
| Antimicrobial Nanoparticles | Bimetallic AgCu | Multiple bacteria & fungi | Varying (MIC: 7-62.5 µg/mL) | Agar well diffusion identified as the most reliable primary method [9]. |
Experimental Protocols
Agar Well Diffusion Assay for Cell-Free Supernatants
This protocol is adapted from a 2025 study screening LAB supernatants against C. acnes [25].
Materials Required:
- Mueller-Hinton Agar (MHA) or Nutrient Agar (NA) plates [25] [9].
- Brain Heart Infusion (BHI) broth for cultivating C. acnes [25].
- Sterile cotton swabs.
- Sterile cork borer or tip (6-8 mm diameter).
- Micropipette and sterile tips.
Procedure:
- Preparation of Test Organism: Inoculate C. acnes into BHI broth and incubate at 37°C until a turbid suspension is achieved. Adjust the suspension to a density of approximately 1.5 × 10^8 CFU/mL (equivalent to a 0.5 McFarland standard) [25].
- Inoculation of Agar Plates: Using a sterile cotton swab, dip into the adjusted microbial suspension and swab it evenly over the entire surface of the MHA or NA plate to create a uniform bacterial lawn. Allow the surface to dry for a few minutes [25].
- Creation of Wells: Using a sterile cork borer or pipette tip, punch 6-mm diameter wells into the solidified agar [25].
- Loading the Test Substance: Pipette 100 µL of the cell-free supernatant (centrifuged and pH-neutralized if necessary) into the well. Ensure not to overfill. A negative control (e.g., sterile growth medium) should be included [25].
- Incubation: Seal the plates and incubate them at 37°C for 48 hours under anaerobic conditions suitable for C. acnes [25].
- Measurement: After incubation, measure the diameter of the clear zone of inhibition around the well in millimeters (mm) using a caliper or ruler [25].
Agar Well Diffusion Assay for Plant Extracts
The following workflow outlines the key steps in preparing and testing plant extracts using the agar well diffusion method, incorporating best practices for handling hydrophobic compounds [27] [28].
Procedure Details:
- Plant Extract Preparation: The first step involves the maceration of plant material, typically using a solvent like methanol for immersion to extract bioactive compounds [28].
- Sample Preparation: For essential oils or non-water-soluble extracts, dissolve the sample in a suitable water-miscible solvent like DMSO or Tween 80. The final concentration of the solvent in the well should not possess antimicrobial activity itself (generally ≤1%) [27].
- Lawn Preparation and Well Creation: Follow the steps outlined in section 3.1 (steps 2 and 3) to prepare the bacterial lawn and create wells. Common test organisms include Staphylococcus aureus and Escherichia coli [26].
- Loading Samples: Pipette 50-100 µL of the prepared plant extract into the well [26] [28].
- Incubation and Measurement: Incubate the plates at 37°C for 18-24 hours (or as required by the test microorganism), then measure the zones of inhibition [26].
The Scientist's Toolkit: Essential Research Reagents
Successful execution of the agar well diffusion assay requires specific materials and reagents. The following table lists key solutions and their critical functions in the protocol.
Table 2: Essential Research Reagent Solutions for Agar Well Diffusion
| Reagent / Material | Function in the Assay | Example & Notes |
|---|---|---|
| Culture Media | Supports growth of the test microorganism. | Mueller-Hinton Agar (MHA): The standard non-selective medium for antimicrobial susceptibility testing [9]. Brain Heart Infusion (BHI): Used for fastidious organisms like C. acnes [25]. |
| Emulsifiers / Solvents | Dissolves and disperses hydrophobic samples for effective diffusion. | DMSO, Tween 80, Polysorbate 80: Critical for testing essential oils and plant extracts. Must be non-inhibitory at working concentrations [27]. |
| Standardized Inoculum | Ensures consistent and reproducible microbial growth. | 0.5 McFarland Standard (~1.5 x 10^8 CFU/mL): Used to standardize the density of the bacterial suspension for lawn preparation [25]. |
| Positive Control | Validates the setup and sensitivity of the test organism. | Known antibiotics (e.g., Chloramphenicol) or reference antimicrobials (e.g., medical-grade Manuka honey) [26]. |
| Negative Control | Confirms that observed activity is from the test substance. | Sterile growth medium (for CFS) or solvent/emulsifier alone (for extracts) [25] [27]. |
Critical Considerations for Robust Results
To ensure reliable and interpretable results, researchers must account for several key variables:
- Sample Physicochemical Properties: The hydrophobicity, molecular size, and volatility of antimicrobial compounds in plant extracts or CFS significantly impact their diffusion rate through the agar matrix. This can lead to variations in zone sizes that do not always directly correlate with overall potency [27].
- Method Customization: The assay can be adapted for different sample types. For instance, when working with CFS, steps like pH neutralization or heat treatment can help distinguish the effects of organic acids from other antimicrobial metabolites like bacteriocins [25] [26].
- Reproducibility and Validation: While the agar well diffusion is an excellent primary screen, it is primarily a qualitative to semi-quantitative method. For a more precise quantitative assessment, follow-up tests such as broth dilution methods to determine the Minimum Inhibitory Concentration (MIC) are recommended [9].
Solving Common Problems and Enhancing Assay Performance
Addressing Challenges with Lipophilic Compounds and Solvent Effects
The agar well diffusion method is a cornerstone technique for initial antimicrobial activity screening due to its low cost, simplicity, and ability to handle multiple samples simultaneously [23]. However, its application in evaluating natural products and novel chemical entities is significantly hampered when dealing with lipophilic compounds. The inherent aqueous nature of standard agar matrices creates a fundamental incompatibility with hydrophobic substances, leading to poor diffusion and potential false-negative results [23]. This challenge is frequently encountered in ethnopharmacology research, such as studies on Annona senegalensis root bark, where bioactive lipophilic fractions and kaurenoic acid demonstrate potent antibacterial effects but require specialized extraction and fractionation using methanol-methylene chloride and ethyl acetate [29]. Similarly, research on lipophilic fractions from thermophilic cyanobacteria (Leptolyngbya sp.) against vancomycin-resistant Staphylococcus aureus (VRSA) underscores the therapeutic importance of these compounds and the critical need for robust methods to evaluate their activity [30]. This application note details the specific challenges and provides optimized, actionable protocols to enhance the reliability of agar well diffusion assays for lipophilic antimicrobial agents, framed within a thesis on methodological advancements in antimicrobial screening.
Key Challenges and Quantitative Data
Lipophilic compounds face several specific barriers in standard agar diffusion assays. The primary issue is limited diffusion through the aqueous agar matrix, which restricts the compound's ability to form a concentration gradient and a discernible zone of inhibition [23]. Furthermore, the choice of solvent is critical; it must adequately dissolve the compound without itself inhibiting bacterial growth or physically distorting the agar. The following table summarizes the core challenges and their implications for the assay.
Table 1: Core Challenges of Lipophilic Compounds in Agar Well Diffusion
| Challenge | Impact on Assay | Potential Consequence |
|---|---|---|
| Limited Aqueous Diffusion | Inability to form a proper concentration gradient in the agar. | False negatives; underestimated antimicrobial potency. |
| Solvent Toxicity | The solvent used to dissolve the lipophilic compound inhibits the test microorganism. | False positives; overestimation of test compound activity. |
| Agar Disruption | Hydrophobic solvents can destabilize the agar matrix around the well. | Irregular, non-circular zones of inhibition; difficult measurement. |
| Solvent Evaporation | Rapid evaporation of low-boiling-point solvents can precipitate the compound. | Inconsistent compound delivery and concentration. |
Research provides quantitative evidence of the efficacy that can be obscured by these methodological challenges. For instance, a lipophilic fraction (F1) from A. senegalensis exhibited a potent MIC of 40 µg/mL against P. aeruginosa, while the purified lipophilic compound, kaurenoic acid (AS2), showed an MIC of 30 µg/mL against B. subtilis [29]. Another study on a lipophilic fraction from Leptolyngbya sp. demonstrated a bactericidal concentration of 0.5 mg/mL against VRSA [30]. Without appropriate methodological adjustments, such promising results from lipophilic compounds could be missed using standard agar diffusion protocols.
Experimental Protocols and Workflows
Overlay Agar Diffusion Protocol
The agar overlay method is a validated strategy to circumvent the diffusion limitations of lipophilic compounds in a full-depth agar plate [31]. This protocol is adapted for assessing semi-solid products, including those containing lipophilic components.
Materials:
- Base Layer: Standard Mueller-Hinton Agar (MHA) or other appropriate nutrient agar.
- Overlay Layer: Soft Agar (e.g., Tryptic Soy Agar with 0.6-0.75% agar).
- Test Organism: Fresh broth culture of target bacteria (e.g., S. aureus, B. subtilis).
- Test Compound: Lipophilic compound dissolved in a suitable solvent (e.g., DMSO, ethanol).
- Sterile Petri dishes.
- Water bath maintained at 45-48°C.
Method:
- Base Layer Preparation: Pour approximately 20 mL of standard MHA into sterile Petri dishes and allow it to solidify completely.
- Inoculum Standardization: Adjust the turbidity of a fresh bacterial broth culture to a 0.5 McFarland standard (~1-2 x 10^8 CFU/mL) [29] [25].
- Inoculated Overlay Preparation: Mix the standardized bacterial inoculum (e.g., 1 mL) with molten soft agar (e.g., 4 mL) that has been tempered in a water bath to 45-48°C. Gently swirl to mix thoroughly, avoiding bubbles.
- Overlay Pouring: Quickly pour the inoculated soft agar mixture over the solidified base layer and swirl gently to ensure an even distribution. Allow the bilayer to solidify completely.
- Well Creation and Loading: Punch wells (typically 6 mm diameter) into the overlay agar. Pipette a standardized volume (e.g., 50-100 µL) of the lipophilic compound solution into the wells. Include controls: a well with solvent only and a well with a standard antibiotic.
- Incubation and Analysis: Incubate the plates under optimal conditions for the test organism (e.g., 37°C for 24 h). Measure the diameter of the inhibition zones (including the well diameter) in millimeters.
Solvent Compatibility and Dilution Protocol
Selecting and validating a suitable solvent is paramount. This protocol outlines the steps for solvent selection and preparation of compound solutions.
Materials:
- Candidate Solvents: Dimethyl Sulfoxide (DMSO), ethanol, methanol, acetone, polyethylene glycol.
- Test Compound.
- Sterile microbiological media.
Method:
- Solvent Pre-screening: Perform a well diffusion assay as described above with the pure solvents to identify any inherent antimicrobial activity. Solvents showing no zone of inhibition are suitable candidates.
- Solution Preparation: Dissolve the lipophilic compound in the pre-screened solvent. DMSO is often the solvent of choice due to its high solubilizing power for organic compounds and low volatility.
- Concentration Series: Prepare serial dilutions of the compound in the selected solvent to be tested in the agar overlay assay. Ensure the final concentration of the solvent in the well is below its antimicrobial threshold (typically <1-5% v/v in the final agar volume surrounding the well).
The following workflow diagram illustrates the decision-making process for selecting the appropriate assay and solvent.
Research Reagent Solutions
Successful evaluation of lipophilic compounds relies on a carefully selected toolkit of reagents and materials. The following table details essential items and their specific functions in overcoming the associated challenges.
Table 2: Essential Research Reagent Solutions for Lipophilic Compound Testing
| Reagent/Material | Function/Application | Key Considerations |
|---|---|---|
| Dimethyl Sulfoxide (DMSO) | Primary solvent for dissolving a wide range of lipophilic compounds. | High solubilizing power; must be pre-tested for antimicrobial activity and used at minimal concentrations (<5% v/v is often safe). |
| Ethanol & Methanol | Alternative solvents for compounds insoluble in DMSO. | Can be antimicrobial at low concentrations; requires stringent solvent controls and evaporation before overlay pouring may be needed. |
| Mueller-Hinton Agar (MHA) | Standardized medium for the base layer in the overlay method. | Provides nutrients and stability; composition is defined by CLSI/EUCAST standards for reproducibility [23]. |
| Tryptic Soy Broth/Agar | Used for growing bacterial inocula and preparing soft overlay agar. | The low agar concentration (0.6-0.75%) in the overlay allows for better diffusion of lipophilic molecules. |
| Tween 20, Tween 80 | Non-ionic surfactants used to emulsify lipophilic compounds in aqueous solutions. | Can enhance diffusion; may also affect microbial cell membrane permeability, requiring careful control experiments. |
| 0.5 McFarland Standard | Reference for standardizing bacterial inoculum density. | Critical for achieving reproducible and comparable zone sizes (~1.5 x 10^8 CFU/mL) [29] [25]. |
Data Interpretation and Analysis
Accurate interpretation of results from adapted protocols is crucial. The diameter of the zone of inhibition (IZD) must be measured precisely. A significant IZD around a well containing the lipophilic compound, with no zone in the solvent-control well, confirms antimicrobial activity attributable to the compound itself. For quantitative analysis, the Minimum Inhibitory Concentration (MIC) can be determined by incorporating the extract or compound at various concentrations into the agar dilution method or, more commonly for lipophilic compounds, by using broth microdilution assays following the initial agar-based screening [29] [23].
The workflow below outlines the step-by-step procedure for the optimized agar overlay method.
The agar well diffusion method is a cornerstone technique for the initial screening and evaluation of potential antimicrobial agents, prized for its simplicity, low cost, and ability to screen large numbers of microorganisms and compounds [2]. This method is extensively used for testing plant extracts, essential oils, pure secondary metabolites, and newly synthesized molecules [2] [1]. The fundamental principle involves the diffusion of an antimicrobial agent from a central well into the surrounding agar medium, which has been inoculated with a test microorganism. The resulting zone of growth inhibition around the well is a qualitative indicator of antimicrobial efficacy [6].
However, the reliability and reproducibility of this method are highly dependent on the strict standardization of several critical operational factors. Uncontrolled variability in media composition, inoculum density, or pre-diffusion conditions can lead to significant discrepancies in results, making comparisons between studies difficult and potentially misleading [2] [24]. This application note details the essential protocols for media selection, inoculum preparation, and pre-incubation to ensure the generation of robust and reproducible data in antimicrobial activity screening, forming a critical component of a thesis dedicated to advancing this field.
Critical Factors and Experimental Protocols
The following sections provide a detailed breakdown of the three critical factors, supported by quantitative data and step-by-step protocols.
Media Selection
The growth medium forms the physical and chemical environment for the test and can drastically influence the diffusion of the antimicrobial agent and the growth of the microorganism.
Key Considerations:
- Composition and Gelling Agent: The type of agar and the concentration of nutrients can affect the diffusion rate and size of inhibition zones. For instance, the use of different commercial media (e.g., Oxoid agar, Merck MH agar, BBL MH II) has been shown to yield significantly different results in disk diffusion tests [4].
- pH and Electrolyte Content: The ionic strength and pH of the medium can alter the structure and activity of some antimicrobial compounds.
- Supplements: Fastidious microorganisms may require supplemented media. For example, testing yeasts with the disk diffusion method requires Mueller Hinton Agar supplemented with 2% glucose and 0.5 mg/mL methylene blue [2].
Recommended Protocol:
- Standard Bacteria: Use unsupplemented Mueller Hinton Agar (MHA) as the default medium for non-fastidious bacteria, as recommended by CLSI standards [2].
- Fastidious Bacteria and Fungi: For fastidious organisms like streptococci or yeasts, adhere to CLSI-specified supplemented media [2].
- Consistency is Key: Use the same brand and batch of culture medium throughout a single study to minimize inter-experiment variability [4].
Impact of Media on Assay Results Table
| Medium Type | Typical Use Case | Impact on Diffusion | Key Consideration |
|---|---|---|---|
| Mueller Hinton Agar (MHA) | Standard method for non-fastidious bacteria [2] | Standard diffusion | The preferred, well-validated medium for AST. |
| Supplemented MHA | Fastidious bacteria (e.g., Streptococcus spp.) and yeasts [2] | May be altered by supplements | Required for adequate growth of certain pathogens. |
| Brain Heart Infusion (BHI) Agar | Used in CLSI agar screen for vancomycin resistance [4] | Varies with brand | Performance can differ significantly between manufacturers (e.g., Difco vs. Oxoid) [4]. |
| Nutrient Agar / Potato Dextrose Agar | Common in research for antibacterial/antifungal activity [6] | Not fully standardized | Can lead to variances between research groups. |
Inoculum Size
The density of the microbial suspension used to inoculate the agar plate is one of the most crucial variables. An incorrect inoculum size can lead to over- or under-estimation of antimicrobial activity.
Key Considerations:
- High Inoculum: May reduce the apparent size of the inhibition zone by overwhelming the antimicrobial agent's capacity, potentially leading to false-negative results.
- Low Inoculum: May result in larger-than-expected inhibition zones, overestimating the compound's potency and potentially yielding false-positive results.
Recommended Protocol for Standardization:
- Prepare Turbidity Standard: Use a 0.5 McFarland standard, which corresponds to approximately 1-2 x 10^8 Colony Forming Units (CFU)/mL for bacteria [2].
- Standardize Inoculum: Adjust the density of the microbial suspension in sterile broth or saline to match the 0.5 McFarland standard.
- Inoculate Plates: Within 15 minutes of adjusting the turbidity, dip a sterile cotton swab into the suspension. Rotate the swab firmly against the tube wall above the liquid to remove excess inoculum. Streak the entire surface of the agar plate three times, rotating the plate approximately 60° each time to ensure even coverage [2].
Standardized Inoculum Sizes for Different Microorganisms Table
| Microorganism Group | Target Inoculum Size (CFU/mL) | Standardization Method | Reference Method |
|---|---|---|---|
| Non-fastidious Bacteria | 1-2 x 10^8 [2] | 0.5 McFarland Standard | CLSI M02-A [2] |
| Yeasts | 1-5 x 10^6 [2] | 0.5 McFarland Standard | CLSI M44-A [2] |
| Molds | 0.4-5 x 10^6 [2] | Spectrophotometric | CLSI M51-A [2] |
Pre-incubation
Pre-incubation, or the rest period after creating the wells and applying the sample but before the main incubation, is vital for the initial diffusion of the test substance into the agar.
Key Considerations:
- Purpose: This period allows the antimicrobial agent to diffuse from the well into the surrounding agar before active microbial growth begins. This establishes a concentration gradient that is critical for the formation of a clear inhibition zone.
- Duration: A pre-incubation period of 1 hour at room temperature is a commonly used protocol to facilitate this initial diffusion [6].
- Temperature: Pre-incubation is typically performed at room temperature to permit diffusion without initiating significant microbial growth.
Recommended Protocol:
- After the agar plate has been inoculated and the wells have been filled with the test substance, leave the plates undisturbed at room temperature with the lid on.
- Maintain this pre-incubation period for 1 hour [6].
- After this period, transfer the plates to the appropriate incubator (e.g., 35 ± 2 °C for bacteria) for the standard incubation duration (e.g., 16-20 hours for most bacteria) [2].
The Scientist's Toolkit: Research Reagent Solutions
The following table outlines the essential materials required for performing a standardized agar well diffusion assay.
| Reagent/Material | Function in the Assay | Specification & Notes |
|---|---|---|
| Mueller Hinton Agar | Standardized growth medium for non-fastidious bacteria. | Follow manufacturer's preparation instructions; pour plates to a uniform depth (typically 4 mm). |
| 0.5 McFarland Standard | Reference for standardizing the microbial inoculum density. | Commercially available or prepared in-house; ensures a target of 1-2 x 10^8 CFU/mL for bacteria. |
| Sterile Cotton Swabs | Application of the standardized microbial inoculum onto the agar surface. | Ensure even coverage of the entire plate surface via three-way streaking. |
| Sterile Cork Borer | Creation of uniform wells in the solidified agar. | Typical diameter is 5-6 mm; creates a reservoir for the test sample [6]. |
| Solvent/Emulsifier | Diluent for hydrophobic compounds (e.g., essential oils, plant extracts). | Common choices include Tween 80, DMSO, or Polyethylene Glycol 400 (PEG); a solvent control is mandatory [27]. |
Experimental Workflow Visualization
The following diagram illustrates the complete, standardized workflow for the agar well diffusion method, integrating the three critical factors discussed.
Agar Well Diffusion Workflow. This flowchart outlines the key procedural steps, highlighting the pre-incubation stage as a critical juncture.
The agar well diffusion method remains a powerful and accessible tool for the preliminary screening of antimicrobial agents. Its value, however, is contingent upon rigorous standardization. As detailed in these application notes, the careful selection of growth media, precise standardization of inoculum size, and consistent application of a pre-incubation period are non-negotiable factors for generating reliable, reproducible, and comparable data. Adherence to these protocols, often based on established guidelines from bodies like CLSI, ensures that results are scientifically sound and contribute meaningfully to the ongoing battle against antimicrobial resistance.
The agar well diffusion method is a fundamental technique for screening the antimicrobial activity of plant extracts, synthetic compounds, and other test substances. Despite its widespread use in research and drug development, researchers frequently encounter technical challenges that can compromise result interpretation. This guide addresses three prevalent issues—faint zones of inhibition, irregularly shaped zones, and absent zones—by providing detailed protocols for troubleshooting and optimization. Proper execution is critical for generating reliable, reproducible data that accurately reflects antimicrobial potency [1] [2].
Problem 1: Faint Zones of Inhibition
Root Causes and Diagnostic Protocol
Faint or poorly defined zones of inhibition frequently result from issues related to microbial growth dynamics, compound diffusion, or visualization techniques. The following workflow outlines a systematic approach for diagnosing the primary cause.
Experimental Solutions and Protocols
Protocol 2.2.1: Inoculum Standardization
- Purpose: To achieve correct microbial inoculum density for optimal lawn growth and clear zone formation.
- Materials: Sterile saline or broth, McFarland standard 0.5, spectrophotometer or visual comparison tubes, sterile swabs.
- Procedure:
- Prepare microbial suspension in sterile saline from fresh colonies (18-24 hour culture).
- Adjust turbidity to match 0.5 McFarland standard (approximately 1.5 × 10^8 CFU/mL for bacteria) [32].
- Within 15 minutes of adjustment, dip sterile swab into suspension and rotate firmly against tube wall to remove excess liquid.
- Swab entire agar surface in three directions (60° rotation each time) for confluent lawn [2].
Protocol 2.2.2: Agar Staining for Enhanced Visualization
- Purpose: To improve contrast between microbial growth and inhibition zones for clearer photodocumentation and measurement.
- Materials: Crystal violet (0.01% w/v), methyl orange (0.01% w/v), or other vital stains; destaining solution; imaging system.
- Procedure:
- After incubation, flood agar surface with crystal violet solution for 5-10 minutes.
- Pour off excess stain and gently rinse with water.
- Alternatively, incorporate stain directly into agar during preparation [33].
- Capture images with consistent lighting against contrasting background.
- Measure zone diameters using calibrated imaging software.
Protocol 2.2.3: Solvent Optimization for Test Compounds
- Purpose: To enhance solubility and diffusion of antimicrobial compounds without inhibiting microbial growth.
- Materials: Different solvents (water, DMSO, ethanol, methanol), sterile filters, test compound.
- Procedure:
- Prepare test compound solutions in various solvents at same concentration.
- Include solvent controls (without antimicrobial) to assess growth inhibition.
- Filter-sterilize solutions if not heat-stable.
- Compare zone clarity and size across solvent types, selecting optimal balance between solubility and non-toxicity [12].
Table 1: Troubleshooting Faint Zones of Inhibition
| Root Cause | Detection Method | Corrective Protocol | Expected Outcome |
|---|---|---|---|
| Incorrect Inoculum Density | Compare to McFarland 0.5 standard; check for confluent growth | Standardize inoculum to 0.5 McFarland; ensure uniform swabbing | Clearly defined zones with even background growth |
| Poor Compound Diffusion | Measure zone diameter over time; check for concentration gradient | Optimize solvent system; verify agar depth (4mm); use smaller molecular weight compounds | Larger, more distinct zones with sharp edges |
| Insufficient Contrast | Visual inspection under different lighting; attempt photodocumentation | Implement agar staining with crystal violet; use oblique lighting | Enhanced visibility for accurate measurement |
| Suboptimal Incubation Conditions | Check temperature calibration; verify incubation time | Maintain 35±2°C for most pathogens; adhere to 16-18 hour incubation | Consistent growth and inhibition patterns |
Problem 2: Irregularly Shaped Zones
Root Causes and Diagnostic Protocol
Irregular zone shapes (asymmetrical, teardrop-shaped, or scalloped edges) typically indicate technical inconsistencies in agar preparation, well creation, or diffusion conditions. The following diagnostic workflow identifies specific failure points.
Experimental Solutions and Protocols
Protocol 3.2.1: Agar Plate Preparation Standardization
- Purpose: To achieve uniform agar depth and surface for consistent compound diffusion.
- Materials: Mueller-Hinton agar (or other appropriate medium), leveling table, agar depth calibrator, sterile Petri dishes.
- Procedure:
- Melt agar medium and cool to 45-50°C before pouring.
- Place Petri dishes on confirmed level surface.
- Pour approximately 20-25 mL agar per standard Petri dish to achieve 4mm depth.
- Use depth calibrator to verify consistency across plates.
- Allow to solidify on level surface for 30 minutes before use [32].
Protocol 3.2.2: Precision Well Creation
- Purpose: To create wells with smooth, vertical walls and intact agar-well interface.
- Materials: Sterile cork borer (6-8mm), sterile pipette tips, vacuum aspiration system.
- Procedure:
- Use sharp, sterile cork borer - replace if dull.
- Press straight down into agar without twisting to create clean well.
- Carefully remove agar plug using vacuum aspiration without damaging well walls.
- Seal well-agar interface with minimal molten agar if leakage observed.
- Place wells at predetermined, spaced locations to prevent zone overlapping.
Protocol 3.2.3: Incubation Condition Control
- Purpose: To maintain level, humidified environment for uniform diffusion.
- Materials: Leveling tool, calibrated incubator, humidity indicators.
- Procedure:
- Verify incubator shelf is level using bubble level.
- Maintain humidity at 85-95% to prevent agar drying.
- Avoid stacking plates tightly to ensure air circulation.
- Record temperature and humidity throughout incubation.
Table 2: Troubleshooting Irregular Zone Shapes
| Root Cause | Detection Method | Corrective Protocol | Expected Outcome |
|---|---|---|---|
| Uneven Agar Surface | Visual inspection; measure depth at multiple points | Pour agar on leveled surface; use consistent volume | Uniform compound diffusion in all directions |
| Improper Well Sealing | Observe leakage around well edges | Seal interface with minimal molten agar; let solidify before adding compound | Circular zones without teardrop shapes |
| Rough Well Edges | Microscopic examination of well walls | Use sharp cork borer; replace regularly | Smooth, circular zone boundaries |
| Non-level Incubation | Check with bubble level; measure zones in multiple directions | Level incubator shelves; avoid stacking plates | Perfectly circular inhibition zones |
| Inconsistent Agar Composition | Check manufacturer; prepare according to CLSI standards | Use validated Mueller-Hinton agar; quality control each batch | Reproducible diffusion characteristics |
Problem 3: No Zones of Inhibition
Root Causes and Diagnostic Protocol
Complete absence of zones of inhibition can result from biological resistance, compound inactivity, or methodological failures. This diagnostic pathway systematically eliminates potential causes.
Experimental Solutions and Protocols
Protocol 4.2.1: Compound Integrity and Potency Verification
- Purpose: To confirm antimicrobial activity of test compounds and exclude degradation issues.
- Materials: Reference antimicrobial compounds, quality control microbial strains, fresh solvent.
- Procedure:
- Include standard antibiotics (e.g., ciprofloxacin for bacteria) as positive controls.
- Use quality control strains with known susceptibility (e.g., S. aureus ATCC 25923, E. coli ATCC 25922).
- Prepare fresh solutions of test compounds and standards.
- Verify compound stability under storage conditions.
- Compare zone sizes with historical laboratory data for consistency [12].
Protocol 4.2.2: Culture Viability and Purity Confirmation
- Purpose: To ensure microbial inoculum is viable, pure, and appropriate for testing.
- Materials: Fresh culture media, purity plates, incubation facilities.
- Procedure:
- Subculture microorganisms on appropriate media 2-3 times before testing.
- Check culture purity by streaking on non-selective media.
- Confirm identity of fastidious organisms requiring special conditions.
- Use logarithmic phase cultures (typically 18-24 hours for bacteria).
- Verify growth characteristics on control plates without antimicrobials.
Protocol 4.2.3: Concentration and Bioavailability Optimization
- Purpose: To ensure test compound is at sufficient concentration and in bioavailable form.
- Materials: High concentration stock solutions, solubility enhancers, concentration verification methods.
- Procedure:
- Prepare concentration series to determine minimum effective concentration.
- For lipophilic compounds, use appropriate solvents that maintain bioavailability.
- Consider molecular size - compounds >1000 Da may not diffuse effectively in agar.
- Verify final concentration in wells using analytical methods if possible.
Table 3: Troubleshooting Absent Zones of Inhibition
| Root Cause | Detection Method | Corrective Protocol | Expected Outcome |
|---|---|---|---|
| Compound Inactivity | Test with quality control strains; include positive controls | Verify compound integrity; test with reference microorganisms | Zones with control compounds; confirms assay validity |
| Microbial Resistance | Use control strains with known susceptibility patterns | Employ multiple test organisms; check for intrinsic resistance | Differential activity across microbial species |
| Improper Concentration | Prepare concentration series; verify stock solution potency | Use appropriate initial concentration; check dilution accuracy | Dose-dependent zones of inhibition |
| Compound Degradation | Analyze compound stability; use fresh preparations | Proper storage conditions; prepare solutions immediately before use | Restoration of antimicrobial activity |
| Molecular Size Too Large | Check molecular weight; review literature on diffusion | Use alternative methods for large molecules (e.g., poisoned food) | Appropriate assessment of antimicrobial activity |
The Scientist's Toolkit: Essential Research Reagents
Table 4: Key Research Reagents for Agar Well Diffusion Studies
| Reagent/Material | Specification | Function | Quality Control |
|---|---|---|---|
| Mueller-Hinton Agar | CLSI compliant [2] | Standardized growth medium for antimicrobial susceptibility testing | Check cation content; verify with QC strains |
| McFarland Standards | 0.5 (1.5 × 10^8 CFU/mL) [32] | Inoculum density standardization | Visual or spectrophotometric verification |
| Crystal Violet Stain | 0.01% w/v aqueous solution [33] | Enhances contrast for zone visualization | Test staining efficiency with control organisms |
| DMSO | Molecular biology grade [12] | Solvent for lipophilic compounds | Ensure concentration <2.5% to avoid microbial inhibition |
| Reference Antimicrobials | CLSI recommended [2] | Positive controls for assay validation | Verify potency and storage conditions |
| Quality Control Strains | ATCC standards (e.g., S. aureus 25923) [12] | Assay performance verification | Maintain proper storage and subculturing |
Successful application of the agar well diffusion method requires meticulous attention to technical details and systematic troubleshooting when anomalies occur. This guide provides structured protocols for addressing the most common challenges researchers encounter. By implementing these standardized procedures and maintaining rigorous quality control of reagents and microorganisms, laboratories can generate reliable, reproducible data that accurately reflects the antimicrobial potential of tested compounds. Proper technique validation is particularly crucial when working with novel antimicrobial candidates where reference data may be limited.
The agar well diffusion method is a cornerstone technique for screening antimicrobial activity, prized for its simplicity, low cost, and ability to perform large-scale screenings [1] [6]. Its fundamental principle involves the diffusion of an antimicrobial agent from a central well into the surrounding agar medium, which has been inoculated with a test microorganism. The resulting zone of inhibition around the well after incubation provides a qualitative measure of the substance's antimicrobial potency [6]. However, a significant limitation of this method arises when evaluating hydrophobic agents, which exhibit poor diffusion through the aqueous agar matrix, potentially leading to false-negative results or underestimated efficacy.
Advanced computational models, particularly dissipative diffusion models, offer a powerful solution to this challenge. These generative AI models have demonstrated remarkable performance in designing complex molecular structures, including diverse antimicrobial peptides (AMPs), by learning to reinterpret noise into structured data within a learned latent space [34]. In the context of hydrophobic agents, such models can predict the diffusion behavior and optimize the experimental setup or the molecular formulation of the agent itself to enhance its bioavailability and diffusion in agar-based assays, thereby providing a more accurate assessment of its antimicrobial potential.
The following tables summarize key quantitative data from recent research utilizing diffusion models for antimicrobial agent design and standard measurements from antimicrobial activity evaluations.
Table 1: Experimentally Validated Antimicrobial Peptides Designed by a Latent Diffusion Model Pipeline This table summarizes the results of experimental validation for peptides generated by an AI pipeline based on a latent diffusion model. Among 40 synthesized peptides, 25 showed antimicrobial activity, with 9 exhibiting particularly high potency [34].
| Peptide Identifier | Antimicrobial Activity | Target Pathogen(s) | Minimum Inhibitory Concentration (MIC) | In Vivo Efficacy Model |
|---|---|---|---|---|
| AMP-29 | Selective Antifungal | Candida glabrata | Not Specified | Murine skin infection model |
| AMP-24 | Antibacterial (Gram-negative) | Acinetobacter baumannii | Not Specified | Skin and lung infection models |
| Other Active Peptides | Antibacterial or Antifungal | Various | ≤ 12.5 μM (for highly active subset) | Not Specified |
Table 2: Standard Measurements in Agar Well Diffusion Antimicrobial Assays This table outlines the standard quantitative measurements and their interpretations used in agar well diffusion and broth dilution methods [1] [6] [35].
| Measurement Type | Method | Typical Unit | Interpretation of Results |
|---|---|---|---|
| Zone of Inhibition (ZOI) | Agar Well/Disk Diffusion | Millimeters (mm) | A larger zone indicates greater antimicrobial diffusion and/or potency [6] [35]. |
| Minimum Inhibitory Concentration (MIC) | Broth Micro/Macrodilution | µg/ml or mg/ml | The lowest concentration that prevents visible growth; a lower value indicates higher potency [1] [35]. |
| Minimum Bactericidal Concentration (MBC) | Broth Dilution + Subculturing | µg/ml or mg/ml | The lowest concentration that kills 99.9% of the inoculum [35]. |
Experimental Protocol: Agar Well Diffusion Assay for Hydrophobic Agents
This protocol details the steps for evaluating hydrophobic antimicrobial agents using the agar well diffusion method, incorporating considerations for solubilizing hydrophobic compounds based on established methodologies [6] [35].
Materials and Reagents
- Microbial Strains: Test organisms (e.g., Staphylococcus aureus MCC 2408, Escherichia coli MCC 2413).
- Growth Media: Mueller-Hinton Agar (MHA) for bacteria; Potato Dextrose Agar (PDA) for fungi.
- Test Agent: The hydrophobic compound to be evaluated.
- Solvents: Dimethyl sulfoxide (DMSO) or ethanol for solubilizing hydrophobic agents.
- Controls: Appropriate positive (e.g., Ciprofloxacin antibiotic disks) and negative (solvent alone) controls.
- Equipment: Sterile Petri dishes, sterile cotton swabs, sterile cork borer or glass tube (6-8 mm diameter), micropipettes, incubator.
Procedure
- Preparation of Agar Plates: Pour approximately 20-25 mL of molten, sterile MHA or PDA into sterile Petri dishes. Allow the agar to solidify completely at room temperature.
- Standardization of Inoculum: Prepare a suspension of the test microorganism in a nutrient broth, equivalent to the 0.5 McFarland standard (approximately 1-2 x 10^8 CFU/mL for bacteria).
- Inoculation of Agar Plate: Dip a sterile cotton swab into the standardized inoculum. Evenly swab the entire surface of the agar plate in three directions (rotating the plate approximately 60° each time) to ensure a uniform lawn of growth.
- Well Creation: Using a sterile cork borer, aseptically punch 6-8 mm diameter wells in the inoculated agar. Carefully remove the agar plug.
- Preparation and Loading of Test Agent:
- Dissolve the hydrophobic test agent in a suitable solvent like DMSO to prepare a stock solution (e.g., 100 mg/mL) [35].
- Further dilute the stock solution as needed. Using a micropipette, dispense a fixed volume (typically 50-100 µL) of the test solution into a designated well.
- For the negative control, load the same volume of pure solvent into a separate well.
- For the positive control, place a commercial antibiotic disk on the agar surface.
- Pre-diffusion and Incubation: Allow the plates to stand at room temperature for 1-2 hours for pre-incubation diffusion. Then, incub the plates in an inverted position at 37°C for 18-24 hours (for bacteria).
- Measurement of Zones of Inhibition: After incubation, measure the diameter of the clear zone of inhibition (including the well's diameter) around each well in millimeters using a ruler or calipers. Perform all experiments in triplicate for statistical reliability.
Visual Workflow and Signaling Pathways
The following diagram illustrates the integrated computational and experimental workflow for designing and evaluating antimicrobial agents using a latent diffusion model, with a focus on hydrophobic compounds.
Diagram 1: Integrated AI-Experimental Workflow for Hydrophobic Agent Development. This workflow merges a generative AI pipeline for candidate design [34] with a standardized experimental protocol for validation [6] [35], highlighting the critical solubilization step for hydrophobic agents.
The Scientist's Toolkit: Research Reagent Solutions
Table 3: Essential Materials and Reagents for Agar Well Diffusion Assays with Hydrophobic Agents This table details key reagents, their functions, and specific considerations for evaluating hydrophobic antimicrobial compounds.
| Reagent/Material | Function/Role in the Assay | Key Considerations for Hydrophobic Agents |
|---|---|---|
| Dimethyl Sulfoxide (DMSO) | A polar aprotic solvent used to dissolve a wide range of hydrophobic and hydrophilic compounds [35]. | A common solvent for creating stock solutions of hydrophobic agents. The final concentration in the well should be controlled (e.g., <1-5%) to avoid antimicrobial effects on its own. |
| Mueller-Hinton Agar (MHA) | A non-selective, non-differential growth medium specifically recommended for standardized antimicrobial susceptibility testing [35]. | The aqueous gel matrix presents a diffusion barrier for hydrophobic molecules. The composition and density of the agar can influence the diffusion rate. |
| Ciprofloxacin Disk | A broad-spectrum antibiotic used as a positive control to validate the test conditions and susceptibility of the test organism [35]. | Provides a benchmark for a well-diffusing, potent antimicrobial agent. The zone size for the control should fall within expected ranges for the test to be valid. |
| Sterile Cork Borer | Tool for creating uniform wells in the agar for the application of the test solution [6]. | Well diameter (typically 6-8 mm) must be consistent, as it affects the initial concentration and total amount of the agent available for diffusion. |
| Dimethyl Sulfoxide (DMSO) Control | A negative control to confirm that the solvent used to dissolve the agent does not itself cause a zone of inhibition [35]. | Critical for assays using DMSO. Any zone from the solvent control must be subtracted from the zones of test agents dissolved in the same solvent. |
Assay Reliability: Correlation with Broth Dilution and Other Methods
Comparing Agar Well Diffusion with Broth Microdilution and Etest
In the field of antimicrobial research, selecting an appropriate susceptibility testing method is fundamental for generating reliable and actionable data. The agar well diffusion, broth microdilution, and Etest methods represent distinct approaches, each with unique advantages and limitations. While the agar well diffusion method is widely valued for its simplicity and cost-effectiveness in initial screening of novel compounds, particularly plant extracts [36] [10], broth microdilution provides precise, quantitative Minimum Inhibitory Concentration (MIC) data and is often considered the reference standard for dilution methods [37] [38]. The Etest bridges these approaches by offering quantitative MIC results on agar plates with ease of use similar to diffusion methods [39] [40]. This application note provides a detailed comparison of these three techniques to guide researchers in selecting the most appropriate methodology for their antimicrobial activity screening research.
Method Comparison & Data Presentation
Technical Characteristics and Applications
Table 1: Core characteristics of the three antimicrobial susceptibility testing methods.
| Parameter | Agar Well Diffusion | Broth Microdilution | Etest |
|---|---|---|---|
| Principle | Diffusion of antimicrobial agent from a well into agar medium; measurement of inhibition zone diameter [36] | Dilution of antimicrobial agent in liquid broth; determination of MIC [38] | Stable antibiotic gradient on a plastic strip; elliptical inhibition zone intersects MIC scale [39] |
| Output | Qualitative/Semi-quantitative (zone diameter in mm) [36] | Quantitative (MIC in µg/mL) [37] [38] | Quantitative (MIC in µg/mL) [40] |
| Throughput | Moderate | High (especially with 96-well plates) | Low to Moderate |
| Cost | Low | Moderate | High (strip cost) |
| Ease of Use | Simple, minimal equipment [10] | Requires careful preparation and standardization | Simple, similar to disk diffusion [40] |
| Standardization | Challenging for non-standardized compounds [36] | Well-standardized (CLSI/EUCAST) [38] | Well-standardized for clinical antibiotics [40] |
| Primary Application | Initial screening of crude extracts/novel compounds [36] [10] | Reference method, definitive MIC determination, high-throughput screening [37] [41] | Convenient MIC determination for clinical isolates, fastidious organisms [39] [40] |
Comparative Performance Data
Table 2: Documented agreement between Broth Microdilution, Etest, and Agar Dilution methods from published studies.
| Study Organism | Comparison | Key Findings | Agreement |
|---|---|---|---|
| Campylobacter jejuni/coli [37] | Broth Microdilution vs. Etest | Broth microdilution MICs agreed within 1 log₂ dilution with 90.0% of Etest results. | 90.0% |
| Campylobacter jejuni/coli [37] | Broth Microdilution vs. Agar Dilution | Broth microdilution MICs agreed within 1 log₂ dilution with 78.7% of agar dilution results. | 78.7% |
| Campylobacter spp. [40] | Broth Microdilution (Sensititre) vs. Etest | Categorical agreement for tetracycline, erythromycin, and ciprofloxacin was 97%, 98.5%, and 100%, respectively. | 97-100% |
| Lactobacillus acidophilus group [42] | Broth Microdilution vs. Etest | Good agreement between MICs from both methods, with some agent-specific variations. | Good |
| Pseudomonas aeruginosa [43] | Etest vs. Agar Dilution | Etest showed >90% agreement within 1 doubling dilution for all antimicrobials tested. | >90% |
Experimental Protocols
Detailed Protocol: Agar Well Diffusion Method
The agar well diffusion method is ideal for the initial screening of antimicrobial activity, especially for plant extracts and other novel compounds [36] [10].
- Step 1: Inoculum Preparation. Select 3-5 well-isolated colonies of the test microorganism from a fresh agar plate and suspend them in a suitable broth (e.g., Mueller-Hinton Broth). Adjust the turbidity of the suspension to a 0.5 McFarland standard, which is equivalent to approximately 1-2 x 10⁸ CFU/mL for bacteria [36].
- Step 2: Inoculation of Agar Plates. Dip a sterile cotton swab into the adjusted inoculum suspension. Swab the entire surface of a Mueller-Hinton Agar plate (or another appropriate medium) in three directions (rotating the plate approximately 60° each time) to ensure confluent growth [10].
- Step 3: Well Creation. Using a sterile cork borer or tip, aseptically punch 6-8 mm diameter wells in the solidified, inoculated agar plate. Carefully remove the agar plugs [36].
- Step 4: Application of Test Substance. Fill the wells with a predetermined volume (typically 50-100 µL) of the test solution (e.g., plant extract, antimicrobial compound). A solvent control (e.g., 1% DMSO) and a positive control (e.g., a standard antibiotic like ciprofloxacin) should be included on the same plate [36] [10].
- Step 5: Incubation and Reading. Allow the plates to stand at room temperature for a brief period (about 15-30 minutes) for pre-diffusion. Then, incubate the plates in an inverted position at the appropriate temperature (e.g., 37°C for most human pathogens) for 16-24 hours. Following incubation, measure the diameter of the zones of inhibition (including the well diameter) to the nearest millimeter using a caliper or ruler [36].
Detailed Protocol: Broth Microdilution Method
Broth microdilution is a reference method for determining the Minimum Inhibitory Concentration (MIC) and is highly suitable for high-throughput applications [37] [38].
- Step 1: Preparation of Antimicrobial Stock Solution. Prepare a stock solution of the antimicrobial agent at a high concentration (e.g., 5120 µg/mL for a final starting concentration of 2560 µg/mL). Filter-sterilize the solution if necessary [36].
- Step 2: Serial Dilution in Microtiter Plate. Dispense a volume of broth into all wells of a 96-well microtiter plate. Add an equal volume of the stock antimicrobial solution to the first well of a row. Perform two-fold serial dilutions across the row using a multichannel pipette, changing tips between each dilution to ensure accuracy. The final volume in each well before adding inoculum should be 100 µL [41].
- Step 3: Inoculum Standardization and Addition. Prepare a bacterial inoculum as described in the agar well diffusion protocol (Step 1) and further dilute it in broth to achieve a final concentration of approximately 5 x 10⁵ CFU/mL in each well. Add 100 µL of this standardized inoculum to each well containing the antimicrobial dilutions. This results in a final two-fold dilution of the antimicrobial agent and the target bacterial density [36].
- Step 4: Incubation. Cover the microtiter plate and incubate it at the appropriate temperature (e.g., 35°C ± 2°C) for 16-20 hours [41].
- Step 5: MIC Determination. After incubation, determine the MIC visually. The MIC is the lowest concentration of the antimicrobial agent that completely inhibits visible growth of the organism. To aid visualization, 40 µL of a resazurin solution (0.02%) or TTC (2,3,5-triphenyltetrazolium chloride) can be added to each well and incubated further; a color change indicates microbial growth [36].
Detailed Protocol: Etest Method
The Etest provides a simple and reliable method for obtaining quantitative MIC values directly from an agar plate [40].
- Step 1: Inoculum Preparation and Plating. Follow the same procedure as for agar well diffusion (Steps 1 and 2) to prepare and swab the inoculum onto the surface of an appropriate agar medium (e.g., Mueller-Hinton Agar supplemented with blood for fastidious organisms) [40].
- Step 2: Application of Etest Strips. Allow the inoculated plate to dry for a few minutes. Using sterile forceps, place the predefined Etest strips onto the agar surface. No more than 2-3 strips can be placed on a standard 90-100 mm plate, ensuring they are well-spaced and not too close to the edge.
- Step 3: Incubation. Incub the plates under suitable atmospheric conditions (e.g., ambient air for most bacteria, microaerophilic for Campylobacter) at 35-37°C for 16-24 hours (extended to 48 hours for slow-growing organisms) [40].
- Step 4: MIC Reading. After incubation, an elliptical zone of inhibition will be visible. The MIC value is read directly from the strip at the point where the edge of the inhibition ellipse intersects the MIC scale on the strip [40].
Method Selection Workflow
The following diagram illustrates the decision-making process for selecting the most appropriate antimicrobial susceptibility testing method based on research objectives and practical constraints.
The Scientist's Toolkit: Research Reagent Solutions
Table 3: Essential materials and reagents for performing the featured antimicrobial susceptibility tests.
| Item | Function/Application | Key Considerations |
|---|---|---|
| Mueller-Hinton Agar/Broth [36] [10] | Standard medium for AST for non-fastidious bacteria. Provides reproducibility and is recommended by CLSI. | Must be supplemented with blood (5% lysed horse blood) or other growth factors for fastidious organisms like Campylobacter spp. [37] [40]. |
| Cation-Adjusted Mueller-Hinton Broth (CAMHB) [38] | Recommended broth for broth microdilution. Correct cation concentration is critical for accurate results, especially with aminoglycosides and P. aeruginosa [43]. | |
| 96-Well Microtiter Plates [41] [36] | The core platform for broth microdilution, enabling high-throughput testing. | Can be prepared in-house or purchased as pre-prepared, dried panels from commercial suppliers (e.g., Sensititre) [37] [40]. |
| Etest Strips [39] [40] | Plastic strips impregnated with a predefined, stable gradient of an antimicrobial agent. | Cost is a limiting factor for large-scale studies. A wide range of antibiotics is available. |
| DMSO (Dimethyl Sulfoxide) [36] [10] | Common solvent for dissolving hydrophobic compounds, plant extracts, and some standard antibiotics. | The final concentration in the test system should be ≤1% (v/v) to avoid antimicrobial effects on the test organisms [36]. |
| Resazurin / TTC [36] | Metabolic indicators used as growth markers in broth microdilution. A color change (resazurin: blue to pink; TTC: colorless to red) indicates microbial growth. | Useful for clarifying endpoints, especially with tricky samples where turbidity is difficult to interpret visually. |
| McFarland Standard [36] [40] | A reference standard (0.5 McFarland) used to standardize the density of bacterial inocula for AST, ensuring reproducible results. | Can be purchased as prepared suspensions, turbidity standard tubes, or a densitometer can be used. |
Understanding the Method's Agreement with CLSI Standardized Techniques
The agar well diffusion method is a cornerstone technique for in vitro antimicrobial activity screening. Its reliability and reproducibility, however, are profoundly enhanced when the method is aligned with standards established by the Clinical and Laboratory Standards Institute (CLSI). CLSI provides globally recognized guidelines that define every critical aspect of antimicrobial susceptibility testing (AST), ensuring that results are accurate, reproducible, and comparable across different laboratories [44] [45].
Adherence to CLSI standards is not merely a procedural formality; it is fundamental for generating credible data that can inform drug discovery and development. For researchers investigating novel antimicrobial agents—whether synthetic compounds, natural products, or nanomaterials—utilizing a CLSI-harmonized agar well diffusion protocol validates the screening process and provides a solid foundation for subsequent stages of research and development [1] [2].
Core Principles of CLSI Standardization
The agreement between an in-house method and CLSI standards is measured through the meticulous standardization of several key variables. The core CLSI documents governing these standards for agar-based methods include M02 for disk diffusion, with principles applicable to well diffusion, and M100 for the latest interpretive criteria [45]. The overarching goal is to control all conditions that could influence the size of the zone of inhibition, thereby ensuring that the zone diameter is a reliable indicator of antimicrobial efficacy.
Key Parameters for Standardization
- Growth Medium: CLSI specifies the use of Mueller-Hinton Agar (MHA) for non-fastidious bacteria. The medium must have a precise depth of 4 mm, which directly affects the diffusion rate of the antimicrobial agent [2].
- Inoculum Preparation and Standardization: The bacterial inoculum must be standardized to a specific turbidity, equivalent to a 0.5 McFarland standard, which approximates 1-2 x 10^8 Colony Forming Units per milliliter (CFU/mL) [2]. This creates a confluent lawn of growth.
- Incubation Conditions: Standardized incubation at 35±2°C for 16-18 hours is critical for obtaining reproducible results [2].
Failure to control these parameters can lead to zones of inhibition that are either erroneously large or small, misrepresenting the true activity of the test substance and compromising the integrity of the research.
Detailed CLSI-Aligned Agar Well Diffusion Protocol
This protocol provides a step-by-step guide for evaluating antimicrobial activity using the agar well diffusion method in agreement with CLSI principles.
Materials and Reagents
Table: Essential Research Reagent Solutions
| Reagent/Material | Specification/Function |
|---|---|
| Mueller-Hinton Agar (MHA) | Standardized growth medium for non-fastidious bacteria [2]. |
| Sterile Physiological Saline (0.85%) | Suspension medium for inoculum preparation. |
| McFarland Standard (0.5) | Reference for standardizing inoculum density to ~1.5 x 10^8 CFU/mL [2]. |
| Test Microorganisms | Quality-controlled strains from recognized collections (e.g., ATCC). |
| Sterile Cork Borer or Tip | For creating uniform wells (typically 6-8 mm diameter) in the agar. |
Experimental Workflow
The following diagram illustrates the key stages of the CLSI-aligned agar well diffusion protocol.
Step-by-Step Procedure
- Preparation of Agar Plates: Pour sterilized Mueller-Hinton Agar into Petri dishes to a uniform depth of 4 mm. Allow the agar to solidify at room temperature [2].
- Standardization of Inoculum:
- Prepare a fresh broth culture of the test microorganism and incubate until it achieves log-phase growth.
- Adjust the turbidity of the microbial suspension in sterile saline to match that of a 0.5 McFarland standard [2].
- Inoculation of Test Plates:
- Within 15 minutes of standardizing the inoculum, dip a sterile cotton swab into the suspension.
- Swab the entire surface of the MHA plate three times, rotating the plate approximately 60° each time to ensure even and confluent growth [2].
- Application of Test Substance:
- Using a sterile cork borer or tip, aseptically create wells (typically 6 mm in diameter) in the inoculated agar.
- Dispense a known volume (e.g., 50-100 µL) of the test solution into each well. For comparative purposes, include wells with a negative control (e.g., solvent) and a positive control (known antibiotic).
- Incubation: Allow the plates to stand at room temperature until the test solution has finished diffusing into the agar. Then, incubate the plates in an inverted position at 35±2°C for 16-18 hours [2].
- Measurement and Analysis:
- After incubation, measure the diameter of each zone of inhibition (ZOI), including the well diameter, to the nearest millimeter using a caliper.
- The ZOI is evidenced by a clear area where bacterial growth has been completely inhibited.
Data Presentation and Interpretation
Quantitative Data from CLSI Methods
Table: Comparison of CLSI-Standardized Antimicrobial Testing Methods
| Method | Key Quantitative Output | CLSI Reference Document | Primary Application in Research |
|---|---|---|---|
| Agar Well Diffusion | Zone of Inhibition (ZOI) Diameter (mm) | M02, M100 [45] | Primary screening and qualitative comparison of antimicrobial activity. |
| Broth Microdilution | Minimum Inhibitory Concentration (MIC) in µg/mL | M07 [2] [45] | Quantitative determination of the lowest concentration that inhibits visible growth. |
| Agar Dilution | MIC in µg/mL | M07 [2] | Gold standard for MIC determination, especially for multiple isolates against one agent. |
| Time-Kill Kinetics | Log10 Reduction in CFU/mL over time | M26 [2] | Determination of bactericidal vs. bacteriostatic activity and rate of killing. |
Advancing from Screening to Mechanistic Studies
While the agar well diffusion method is an excellent tool for initial screening, CLSI guidelines recommend complementary methods for a deeper understanding of antimicrobial activity.
- Determining Minimum Inhibitory Concentration (MIC): For a quantitative assessment, the broth microdilution method (CLSI M07) is used. This involves creating two-fold serial dilutions of the antimicrobial agent in a broth and determining the lowest concentration that prevents visible growth after incubation [1] [2]. The resazurin assay can be used as a visual indicator for MIC determination, where a color change from blue to pink indicates microbial growth [1] [46].
- Distinguishing Bactericidal vs. Bacteriostatic Effects: The time-kill kinetics assay (CLSI M26) goes beyond inhibition to determine whether an agent is lethal (bactericidal) or merely growth-inhibiting (bacteriostatic). This test measures the reduction in viable colony count (CFU/mL) over 24 hours [2].
The workflow below demonstrates how these methods integrate into a comprehensive antimicrobial evaluation strategy.
Regulatory Context and Recent Developments
Harmonization with CLSI standards has significant regulatory implications. Recently, the U.S. Food and Drug Administration (FDA) has taken a major step by formally recognizing many CLSI breakpoints, including those in M100 35th Edition and standards for infrequently isolated organisms (M45) [47]. This unprecedented move facilitates the use of modernized interpretive criteria in clinical laboratories and supports the development of new antimicrobials [47].
For researchers, this underscores the critical importance of using the most current editions of CLSI documents. These standards are reviewed and updated annually to reflect new data on resistance mechanisms, pharmacokinetics, and clinical outcomes [45]. Utilizing outdated standards can lead to misinterpretation of susceptibility data and hinder the translation of research findings into clinical applications.
Integrating the agar well diffusion method with CLSI standardized techniques is indispensable for rigorous antimicrobial activity screening. By adhering to meticulously defined protocols for media, inoculum, and incubation, researchers can generate reliable, high-quality data that forms a valid foundation for downstream drug development processes. A CLSI-guided workflow, progressing from initial well diffusion screening to quantitative MIC and time-kill assays, provides a robust framework for accurately characterizing novel antimicrobial agents and contributing to the global fight against antimicrobial resistance.
In the context of antimicrobial activity screening research, selecting an appropriate methodology is paramount. The agar well diffusion method serves as an excellent initial qualitative tool for detecting potential antimicrobial activity in natural extracts, such as those from medicinal plants like Impatiens rothii or Jatropha variegata [36] [48]. However, advancing a research thesis from initial screening to characterizing potency requires a critical understanding of the limitations inherent in qualitative data and a robust transition to quantitative methods like Minimum Inhibitory Concentration (MIC) determination. While diffusion methods provide a rapid visual assessment of inhibition, they are inherently influenced by the diffusibility of the test substance through agar, which can lead to false negatives for compounds with poor solubility, such as essential oils or highly viscous extracts [24] [23]. This application note delineates the core limitations of qualitative data from methods like agar well diffusion, provides detailed protocols for quantitative MIC determination, and offers a framework for selecting the optimal methodology based on the physico-chemical properties of the antimicrobial agent under investigation.
Comparative Analysis: Qualitative and Quantitative AST Methods
The choice between qualitative and quantitative AST methods significantly impacts the type and reliability of the data obtained. The table below summarizes the core characteristics, applications, and limitations of the most common techniques.
Table 1: Core Methodologies for Antimicrobial Susceptibility Testing
| Method Name | Data Type | Primary Output | Key Advantages | Key Limitations |
|---|---|---|---|---|
| Agar Well Diffusion [36] [23] | Qualitative / Semi-Quantitative | Inhibition Zone Diameter (IZD) in mm | Low cost, simple setup, suitable for high-throughput initial screening. | Results depend on compound diffusibility; does not provide MIC values. |
| Disk Diffusion (Kirby-Bauer) [24] [49] | Qualitative / Semi-Quantitative | Inhibition Zone Diameter (IZD) in mm | Standardized, reproducible, economical (~$2-5 per test) [49]. | Cannot determine MIC; unsuitable for poorly diffuse substances. |
| Broth Microdilution [24] [36] | Quantitative | Minimum Inhibitory Concentration (MIC) in µg/mL | High-throughput, uses small reagent volumes, provides exact MIC value. | Colored or turbid extracts can interfere with visual growth reading. |
| Agar Dilution [24] [23] | Quantitative | MIC in µg/mL | Suitable for testing multiple organisms simultaneously on one plate. | Difficult to incorporate hydrophobic extracts stably into agar. |
The limitations of qualitative methods become particularly evident when testing non-conventional substances. For instance, a 2025 study demonstrated significant variability in activity assessment for natural extracts, ionic liquids, and ozonated oils depending on the method used [24]. A substance might show no zone of inhibition in a well diffusion assay due to poor diffusion but exhibit potent activity in a dilution method where diffusion is not a factor. This underscores the risk of false negatives and the premature dismissal of promising antimicrobial candidates when relying on a single, qualitative method [24] [23]. Furthermore, while a larger inhibition zone generally suggests greater potency, the zone size is a function of both the compound's efficacy and its diffusion rate, making direct comparisons between different types of compounds misleading.
Table 2: Method-Dependent Variability in MIC Values (Example Data)
| Substance Tested | Test Organism | Agar Dilution MIC (mg/mL) | Broth Microdilution MIC (mg/mL) | Reference |
|---|---|---|---|---|
| Harpagophytum procumbens Extract | Staphylococcus aureus | 8.33 ± 3.61 | >200 | [24] |
| Rosa canina Extract | Escherichia coli | 10.42 ± 3.61 | 12.5 ± 4.37 | [24] |
| Impatiens rothii Root Extract | Salmonella typhimurium | Not Reported | 3.0 | [36] |
| Jatropha variegata Leaf Extract | Staphylococcus aureus | Not Reported | 400 | [48] |
Detailed Experimental Protocols
Protocol 1: Agar Well Diffusion for Initial Screening
This protocol is adapted from established procedures used to evaluate medicinal plants such as Impatiens rothii and Nicotiana tabacum [36] [10].
Research Reagent Solutions:
- Mueller-Hinton Agar (MHA): Standardized medium for AST as per CLSI/EUCAST guidelines.
- Dimethyl Sulfoxide (DMSO): Common solvent for dissolving hydrophobic natural extracts.
- McFarland Standard: A barium sulfate standard used to adjust the turbidity of the bacterial inoculum to ~1 x 10^8 CFU/mL.
- Positive Control Antibiotics: Ciprofloxacin for bacteria or Amphotericin B for fungi, to validate test conditions.
Procedure:
- Media Preparation: Prepare and sterilize Mueller-Hinton Agar (for bacteria) or Sabouraud Dextrose Agar (for fungi). Pour approximately 20 mL into sterile Petri dishes and allow to solidify [36] [10].
- Inoculum Standardization: Pick 3-5 well-isolated colonies of the test organism and suspend in a sterile broth or saline. Adjust the turbidity of the suspension to match a 0.5 McFarland standard (approximately 1.5 x 10^8 CFU/mL for bacteria) using a spectrophotometer or visual comparator [36] [48].
- Plate Inoculation: Using a sterile cotton swab, inoculate the entire surface of the agar plate uniformly with the standardized inoculum.
- Well Creation: Aseptically punch 6-8 mm diameter wells in the solidified agar using a sterile cork borer or pipette tip [36] [10].
- Sample Loading: Introduce a fixed volume (e.g., 50-100 µL) of the test extract, positive control, and negative control (solvent) into their respective wells.
- Incubation and Analysis: Allow the plates to stand for a brief pre-diffusion period (about 30 minutes) at room temperature, then incubate in an inverted position at 37°C for 18-24 hours (bacteria) or 25-28°C for 48 hours (fungi) [36] [48]. Measure the diameter of the inhibition zones (including the well diameter) in millimeters using a caliper.
Protocol 2: Broth Microdilution for MIC Determination
This quantitative protocol is the reference method for determining the MIC and is based on CLSI and EUCAST standards [24] [36] [23].
Research Reagent Solutions:
- Cation-Adjusted Mueller Hinton Broth (CAMHB): Recommended broth for broth microdilution to ensure consistent cation concentrations.
- Resazurin or TTC (2,3,5-Triphenyltetrazolium chloride): Visual indicators of microbial growth. A change in color (resazurin: blue to pink; TTC: colorless to red) indicates metabolic activity.
- 96-Well Microtiter Plate: U-bottom or flat-bottom plates for housing the dilution series.
Procedure:
- Sample Preparation: Prepare a stock solution of the test extract at the highest concentration to be tested (e.g., 64 mg/mL for plant extracts) in a suitable solvent like DMSO. The final concentration of the solvent in the test well should not exceed 1% (v/v) to avoid antimicrobial effects [36] [23].
- Dilution Series Setup: In a 96-well microtiter plate, perform a two-fold serial dilution of the extract. Add 100 µL of CAMHB to all wells from column 2 to 12. Add 100 µL of the stock solution to the first column. Mix and transfer 100 µL from column 1 to column 2, repeating this process across the plate. Discard 100 µL from the final column to maintain equal volumes [36].
- Inoculum Addition: Prepare a standardized bacterial inoculum (0.5 McFarland) and dilute it in broth to achieve a final concentration of approximately 5 x 10^5 CFU/mL in each well. Add 100 µL of this adjusted inoculum to all test wells.
- Control Setup:
- Growth Control: Well containing broth and inoculum, but no extract.
- Sterility Control: Well containing only broth, to confirm media sterility.
- Positive Control: Well containing a known antibiotic in a dilution series.
- Incubation: Cover the plate and incubate at 37°C for 16-20 hours without shaking [36].
- MIC Endpoint Determination: After incubation, the MIC is the lowest concentration of the extract that completely inhibits visible growth. For clearer visualization, add 40 µL of TTC solution (0.2 mg/mL) to each well and incubate for a further 30-60 minutes. The MIC is the lowest concentration where no pink color (formazan) develops [36].
Diagram 1: AST Workflow from Screening to MIC
Method Selection and Troubleshooting
A Framework for Method Selection
No single method is universally optimal for all compounds. The decision tree below provides a logical pathway for selecting the most appropriate AST method based on the properties of the test substance and the research objective.
Diagram 2: AST Method Selection Guide
Troubleshooting Common Issues
- Poor or No Diffusion in Agar Wells: This is a major limitation for viscous or hydrophobic extracts like essential oils [27]. Solution: Incorporate a low percentage of a solubilizing agent like Tween 20 or DMSO into the agar medium (e.g., 0.5-1%) to facilitate diffusion, or move directly to a broth-based dilution method [23] [27].
- Precipitation in Broth Dilution: Complex natural extracts may precipitate in aqueous broth. Solution: Use a different solvent (e.g., acetone, acetonitrile) or increase the concentration of the emulsifier. Filter-sterilizing the extract stock solution instead of autoclaving can also help [23].
- High MIC Values for Plant Extracts: MICs for crude plant extracts are typically much higher (100-1000 µg/mL) than for pure antibiotics (0.01-10 µg/mL) [23]. Solution: This is often normal. Focus on fractionating the crude extract to isolate the active compound(s), which will have a much lower and more potent MIC.
Navigating the transition from qualitative screening to quantitative MIC determination is a critical step in robust antimicrobial research. The agar well diffusion method is an invaluable, cost-effective tool for initial activity detection, as evidenced by its widespread use in ethnobotanical studies [36] [10] [48]. However, its limitations concerning compound diffusibility and its qualitative nature necessitate confirmation and refinement of results through quantitative broth microdilution. A combined methodological approach, as highlighted in recent literature, is paramount to accurately characterize the antimicrobial potential of novel substances, thereby preventing the dismissal of promising candidates and strengthening the validity of research findings [24]. By applying the detailed protocols and decision-making framework outlined in this document, researchers can generate reliable, reproducible data that effectively bridges the gap between traditional screening and modern quantitative analysis.
Integrating the Method into a Tiered Screening Strategy (Preliminary vs. Confirmatory Tests)
The agar well diffusion method is a foundational, simple, and cost-effective technique widely used for the preliminary evaluation of antimicrobial activity [1] [2]. Its principle relies on the diffusion of an antimicrobial agent from a central well into the surrounding agar medium, which has been seeded with a test microorganism. The resulting zone of growth inhibition provides a qualitative and semi-quantitative measure of the compound's efficacy [6]. Within a tiered screening strategy, this method serves as an excellent first-pass screening tool, allowing researchers to rapidly screen a large number of samples, such as plant extracts, essential oils, synthetic compounds, or nanoparticles, against various microbial targets [1] [9] [14]. Its integration into a structured workflow is crucial for efficiently progressing from initial discovery to the detailed characterization of novel antimicrobial agents, thereby optimizing resource allocation and accelerating the drug development pipeline.
This application note details the integration of the agar well diffusion method into a comprehensive tiered screening strategy, outlining its use in preliminary stages and its dovetailing with subsequent, more sophisticated confirmatory assays.
A Tiered Screening Strategy for Antimicrobial Discovery
A robust antimicrobial screening strategy is designed to be progressive, starting with high-throughput, qualitative methods and advancing toward highly quantitative and mechanistic studies. The chart below illustrates this integrated workflow, positioning the agar well diffusion assay as the critical initial phase.
Preliminary Screening: The Agar Well Diffusion Protocol
The agar well diffusion assay is ideal for preliminary screening due to its simplicity and ability to test multiple samples simultaneously against a single microbial strain [9].
Detailed Experimental Protocol
Materials & Reagents:
- Mueller-Hinton Agar (MHA) for bacteria or Potato Dextrose Agar (PDA) for fungi [6].
- Sterile Mueller-Hinton Broth (MHB) or appropriate nutrient broth.
- Test microorganisms (e.g., Escherichia coli ATCC 25922, Staphylococcus aureus ATCC 2408) [9].
- Test samples (e.g., plant extracts, microbial culture filtrates, nanoparticle suspensions dissolved in a suitable solvent like water or DMSO) [1] [9].
- Sterile physiological saline (0.85% NaCl).
- Sterile cork borer or tip (typically 6-8 mm diameter) [6].
Procedure:
- Preparation of Inoculum:
- Inoculation of Agar Plates:
- Dip a sterile cotton swab into the standardized inoculum suspension. Swab the entire surface of the Mueller-Hinton agar plate uniformly in three directions to ensure a confluent lawn of growth [2].
- Well Creation:
- Sample Loading:
- Pipette a known volume (e.g., 50-100 µL) of the test sample into the respective well. A solvent control should be included to rule out any antimicrobial activity from the solvent itself [14].
- Pre-incubation and Incubation:
- Measurement and Interpretation:
- After incubation, measure the diameter of the zone of inhibition (ZOI) surrounding each well in millimeters using a ruler or caliper [6] [9].
- A clear, circular zone indicates antimicrobial activity. The larger the diameter, the greater the putative antimicrobial potency of the sample under the test conditions.
Advantages and Limitations in Preliminary Screening
Table 1: Key Characteristics of the Agar Well Diffusion Method for Preliminary Screening
| Aspect | Advantage for Screening | Inherent Limitation |
|---|---|---|
| Throughput | High; allows screening of numerous samples or microbial strains on a single plate [1]. | Semi-quantitative; does not yield a precise Minimum Inhibitory Concentration (MIC) [2]. |
| Cost & Simplicity | Low cost, technically simple, requires no specialized equipment [2] [9]. | Susceptible to variability based on sample diffusibility through agar [1]. |
| Result Interpretation | Easy visual interpretation of results via zone of inhibition [2]. | Cannot distinguish between bactericidal (killing) and bacteriostatic (growth inhibition) effects [2]. |
| Sample Flexibility | Suitable for screening crude or complex samples like plant extracts and nanoparticle suspensions [1] [9]. | Results are qualitative, best used for ranking samples for further study rather than definitive potency claims [2]. |
Confirmatory Testing Methods
Samples demonstrating promising activity in the preliminary well diffusion assay must be advanced to quantitative and mechanistic confirmatory tests.
Broth Dilution for Minimum Inhibitory Concentration (MIC)
The broth microdilution method is the standard reference for determining the Minimum Inhibitory Concentration (MIC), which is the lowest concentration of an antimicrobial agent that completely inhibits visible growth of a microorganism [2]. This method provides a quantitative measure of potency.
- Protocol Overview: Two-fold serial dilutions of the test sample are prepared in a broth medium (e.g., Mueller-Hinton Broth) in a microtiter plate [2]. Each well is inoculated with a standardized microbial suspension (e.g., 5 x 10^5 CFU/mL for bacteria) [2]. After incubation (e.g., 16-20 hours at 37°C), the MIC is determined visually as the lowest concentration with no visible growth [2]. To determine whether the effect is bactericidal or bacteriostatic, the Minimum Bactericidal Concentration (MBC) can be ascertained by sub-culturing samples from clear wells onto fresh agar and observing for growth [2].
- Advanced Application: The resazurin assay is a colorimetric variant often used as an endpoint in broth dilution. Metabolically active cells reduce the blue, non-fluorescent resazurin dye to pink, fluorescent resorufin, providing a visual or fluorescent indicator of cell viability [1] [9]. This is particularly useful for automating readouts or for organisms where turbidity is difficult to assess.
Time-Kill Kinetics Assay
This assay provides information on the rate and extent of bactericidal activity [1].
- Protocol Overview: A bacterial culture is exposed to the test compound at a specific concentration (e.g., 1x MIC, 2x MIC). Samples are withdrawn at predetermined time intervals (e.g., 0, 2, 4, 6, 8, 24 hours), serially diluted, and plated on agar to count viable colonies (CFU/mL) [14]. A plot of log10 CFU/mL versus time reveals whether the agent's action is concentration-dependent or time-dependent and can confirm bactericidal (typically a ≥3-log10 reduction in CFU/mL) versus bacteriostatic activity [14].
Synergy Testing (Modified Well Diffusion)
The well diffusion method can be adapted for preliminary synergy testing between two antimicrobial agents, such as an antibiotic and a plant essential oil [14].
- Protocol Overview: The agar plate is inoculated as per the standard method. One agent (e.g., the essential oil) is placed in the central well. Disks or wells containing a second agent (e.g., an antibiotic) are placed at a distance. An enhancement of the inhibition zone between the two agents, often appearing as a "bridge" or distorted zone, indicates a potential synergistic interaction [14]. These findings are typically confirmed with quantitative methods like the checkerboard broth microdilution assay.
Essential Research Reagent Solutions
Successful implementation of this tiered strategy depends on key reagents and materials.
Table 2: Key Research Reagent Solutions for Antimicrobial Screening
| Reagent / Material | Function in Screening | Application Notes |
|---|---|---|
| Mueller-Hinton Agar/Broth | Standardized culture medium for antimicrobial susceptibility testing of non-fastidious bacteria [2] [50]. | Must be prepared according to CLSI guidelines for reproducible results [2]. |
| Defibrinated Sheep Blood | Growth supplement for fastidious organisms (e.g., Arcobacter butzleri, streptococci) in agar or broth dilution [50]. | Typically used at 5% v/v to provide essential nutrients [50]. |
| Resazurin Sodium Salt | Oxidation-reduction indicator used in broth microdilution to determine MIC visually [1] [9]. | A color change from blue/purple to pink/colorless indicates microbial growth; used at 0.02% [9]. |
| Standard Antimicrobials | Controls for susceptibility testing (e.g., ciprofloxacin, tetracycline) to ensure method validity and for comparison [6] [51]. | Quality control strains (e.g., E. coli ATCC 25922, S. aureus ATCC 29213) must be used with standards [2] [50]. |
| Cork Borer (6-8 mm) | Creates uniform wells in the agar for sample application in the well diffusion assay [6] [9]. | Must be sterilized before each use to prevent cross-contamination. |
Integrating the agar well diffusion method into a tiered screening strategy offers a rational and efficient pathway for antimicrobial discovery and development. Its strength lies in its role as a robust, accessible, and high-throughput preliminary screen that effectively prioritizes candidates for more resource-intensive confirmatory tests. By understanding its principles, expertly executing its protocol, and acknowledging its limitations, researchers can leverage this classical technique to build a powerful pipeline, progressing seamlessly from initial activity detection to quantitative potency assessment and mechanistic studies. This integrated approach is vital in the relentless battle against antimicrobial resistance.
Conclusion
The agar well diffusion method remains a vital, cost-effective, and accessible tool for the initial screening of antimicrobial activity, particularly for novel compounds from natural sources. Its strength lies in its simplicity and ability to provide a visual, qualitative result. However, researchers must be cognizant of its limitations, including its qualitative nature and sensitivity to methodological variables. For comprehensive analysis, results from this preliminary assay should be validated with quantitative methods like broth microdilution to determine Minimum Inhibitory Concentrations. Future directions involve the continued standardization of protocols for non-antibiotic compounds and the development of more sophisticated diffusion models that account for compound-medium interactions, ensuring the method's continued relevance in the urgent global fight against antimicrobial resistance.
References
- 1. Methods for screening and evaluation of antimicrobial activity: A review of protocols, advantages, and limitations - PMC [https://pmc.ncbi.nlm.nih.gov/articles/PMC11097785/]
- 2. Methods for in vitro evaluating antimicrobial activity: A review [https://pmc.ncbi.nlm.nih.gov/articles/PMC5762448/]
- 3. Zone of Inhibition - an overview [https://www.sciencedirect.com/topics/biochemistry-genetics-and-molecular-biology/zone-of-inhibition]
- 4. agar-well diffusion method: Topics by Science.gov [https://www.science.gov/topicpages/a/agar-well+diffusion+method]
- 5. Challenges to Antimicrobial Susceptibility Testing of Plant-derived Polyphenolic Compounds - PMC [https://www.ncbi.nlm.nih.gov/pmc/articles/PMC7968511/]
- 6. Agar Well Diffusion Method - an overview [https://www.sciencedirect.com/topics/agricultural-and-biological-sciences/agar-well-diffusion-method]
- 7. In-vitro antibacterial activity of commercially available probiotics on food-borne pathogens along with their synergistic effects with synthetic drugs - PMC [https://pmc.ncbi.nlm.nih.gov/articles/PMC9149184/]
- 8. Overview on Strategies and Assays for Antibiotic Discovery [https://www.mdpi.com/1424-8247/15/10/1302]
- 9. Applied Methods to Assess the Antimicrobial Activity of ... [https://pmc.ncbi.nlm.nih.gov/articles/PMC10669044/]
- 10. Evaluating antimicrobial activity of selected medicinal plant ... [https://www.frontiersin.org/journals/veterinary-science/articles/10.3389/fvets.2025.1563208/full]
- 11. Avoiding pitfalls in determining antimicrobial activity of plant ... [https://bmccomplementmedtherapies.biomedcentral.com/articles/10.1186/s12906-019-2519-3]
- 12. Challenges to Antimicrobial Susceptibility Testing of Plant- ... [https://pmc.ncbi.nlm.nih.gov/articles/PMC7968511/]
- 13. Evaluation of Automated Disk Diffusion Antimicrobial ... [https://link.springer.com/article/10.1007/s00284-024-03710-z]
- 14. Rapid Screening of Essential Oils as Substances Which ... [https://www.mdpi.com/2079-6382/10/4/463]
- 15. Antimicrobial Susceptibility Testing - StatPearls - NCBI - NIH [https://www.ncbi.nlm.nih.gov/books/NBK539714/]
- 16. Pouring LB Agar Plates [https://www.addgene.org/protocols/pouring-lb-agar-plates/]
- 17. Frontiers | Isolation and preliminary screening of lactic acid bacteria for... [https://www.frontiersin.org/journals/microbiology/articles/10.3389/fmicb.2025.1565016/full]
- 18. How to Make Agar Plates: Preparation Method [https://www.ossila.com/pages/preparation-of-agar-plates]
- 19. How to do a Kirby Bauer Disk Diffusion Antimicrobial ... [https://hardydiagnostics.com/blog/how-to-do-a-kirby-bauer-disk-diffusion-antimicrobial-susceptibility-test]
- 20. Antibacterial Efficacy: Step-by-Step Guide to the Well ... [https://hereditybio.in/blog/antibacterial-efficacy-step-by-step-guide-to-the-well-diffusion-method-for-evaluating-activity/]
- 21. Antibiotic susceptibility testing using minimum inhibitory ... [https://www.nature.com/articles/s44259-024-00051-6]
- 22. A Review of Commonly Used Methodologies for Assessing ... [https://www.mdpi.com/2079-6382/11/7/975]
- 23. Current Landscape of Methods to Evaluate Antimicrobial ... [https://www.mdpi.com/1420-3049/28/3/1068]
- 24. Beyond One-Size-Fits-All: Addressing Methodological ... [https://pmc.ncbi.nlm.nih.gov/articles/PMC12382792/]
- 25. -Based Protein Fermentation Medium Optimization for... Plant [https://link.springer.com/article/10.1007/s12602-025-10742-9]
- 26. The Antibacterial Effect In Vitro of Honey Derived from ... [https://pmc.ncbi.nlm.nih.gov/articles/PMC6029468/]
- 27. Methods for Determination of Antimicrobial Activity ... [https://www.mdpi.com/2223-7747/13/19/2784]
- 28. well method assay | BioRender Science Templates [https://www.biorender.com/template/well-method-assay]
- 29. Antimicrobial Effects of a Lipophilic Fraction and Kaurenoic ... [https://pmc.ncbi.nlm.nih.gov/articles/PMC3366254/]
- 30. Lipophilic bioactive compounds from thermophilic ... [https://www.sciencedirect.com/science/article/pii/S2405844024057852]
- 31. Optimisation of an agar overlay assay for the assessment ... [https://www.sciencedirect.com/science/article/pii/S0167701222001919]
- 32. The Importance of Environmental Factors in ZOI Testing [https://microbe-investigations.com/the-importance-of-environmental-factors-in-zoi-testing-results/]
- 33. Better visualization and photodocumentation of zone of ... [https://www.nature.com/articles/ja201549]
- 34. Artificial intelligence using a latent diffusion model enables the ... [https://pmc.ncbi.nlm.nih.gov/articles/PMC11797553/]
- 35. Determination of antibacterial activity by agar well diffusion ... [https://bio-protocol.org/exchange/minidetail?id=10202891&type=30]
- 36. Phytochemical screening and evaluating in vitro ... [https://www.nature.com/articles/s41598-025-20360-8]
- 37. Comparison of Broth Microdilution, E Test, and Agar Dilution ... [https://pmc.ncbi.nlm.nih.gov/articles/PMC150256/]
- 38. Antimicrobial Susceptibility Testing: A Comprehensive Review ... [https://pmc.ncbi.nlm.nih.gov/articles/PMC9024665/]
- 39. Comparison of direct antimicrobial susceptibility testing ... [https://www.sciencedirect.com/science/article/pii/S0924857911002020]
- 40. comparison between Etest and a broth dilution method [https://ann-clinmicrob.biomedcentral.com/articles/10.1186/s12941-018-0275-8]
- 41. Comparison of five commonly used automated susceptibility ... [https://pmc.ncbi.nlm.nih.gov/articles/PMC6122890/]
- 42. Comparison of broth microdilution, Etest, and agar disk ... [https://pubmed.ncbi.nlm.nih.gov/18441109/]
- 43. Comparison of five methods, including the PDM ... [https://pmc.ncbi.nlm.nih.gov/articles/PMC270503/]
- 44. Antimicrobial Susceptibility Testing | Area of Focus [https://clsi.org/standards-development/specialty-areas/antimicrobial-susceptibility-testing/]
- 45. M100 | Performance Standards for Antimicrobial ... [https://clsi.org/shop/standards/m100/]
- 46. Applied Methods to Assess the Antimicrobial Activity of ... [https://www.mdpi.com/2306-5354/10/11/1259]
- 47. Major updates to FDA-recognized Clinical and Laboratory ... [https://pmc.ncbi.nlm.nih.gov/articles/PMC12077184/]
- 48. In-vitro antimicrobial activity of Jatropha variegata Vahl. ... [https://pmc.ncbi.nlm.nih.gov/articles/PMC12238237/]
- 49. Detecting antibiotic resistance: classical, molecular ... [https://www.frontiersin.org/journals/microbiology/articles/10.3389/fmicb.2025.1673343/full]
- 50. Evaluation of agar dilution as an alternative method for ... [https://www.nature.com/articles/s41598-025-16223-x]
- 51. Screening and evaluation of antibacterial active strains ... [https://link.springer.com/article/10.1007/s43994-024-00164-8]